Depth and Perspective in Small Aquascapes
Use slope, scale, plant texture, focal points, and open foreground space to make small planted aquariums feel deeper without crowding them.
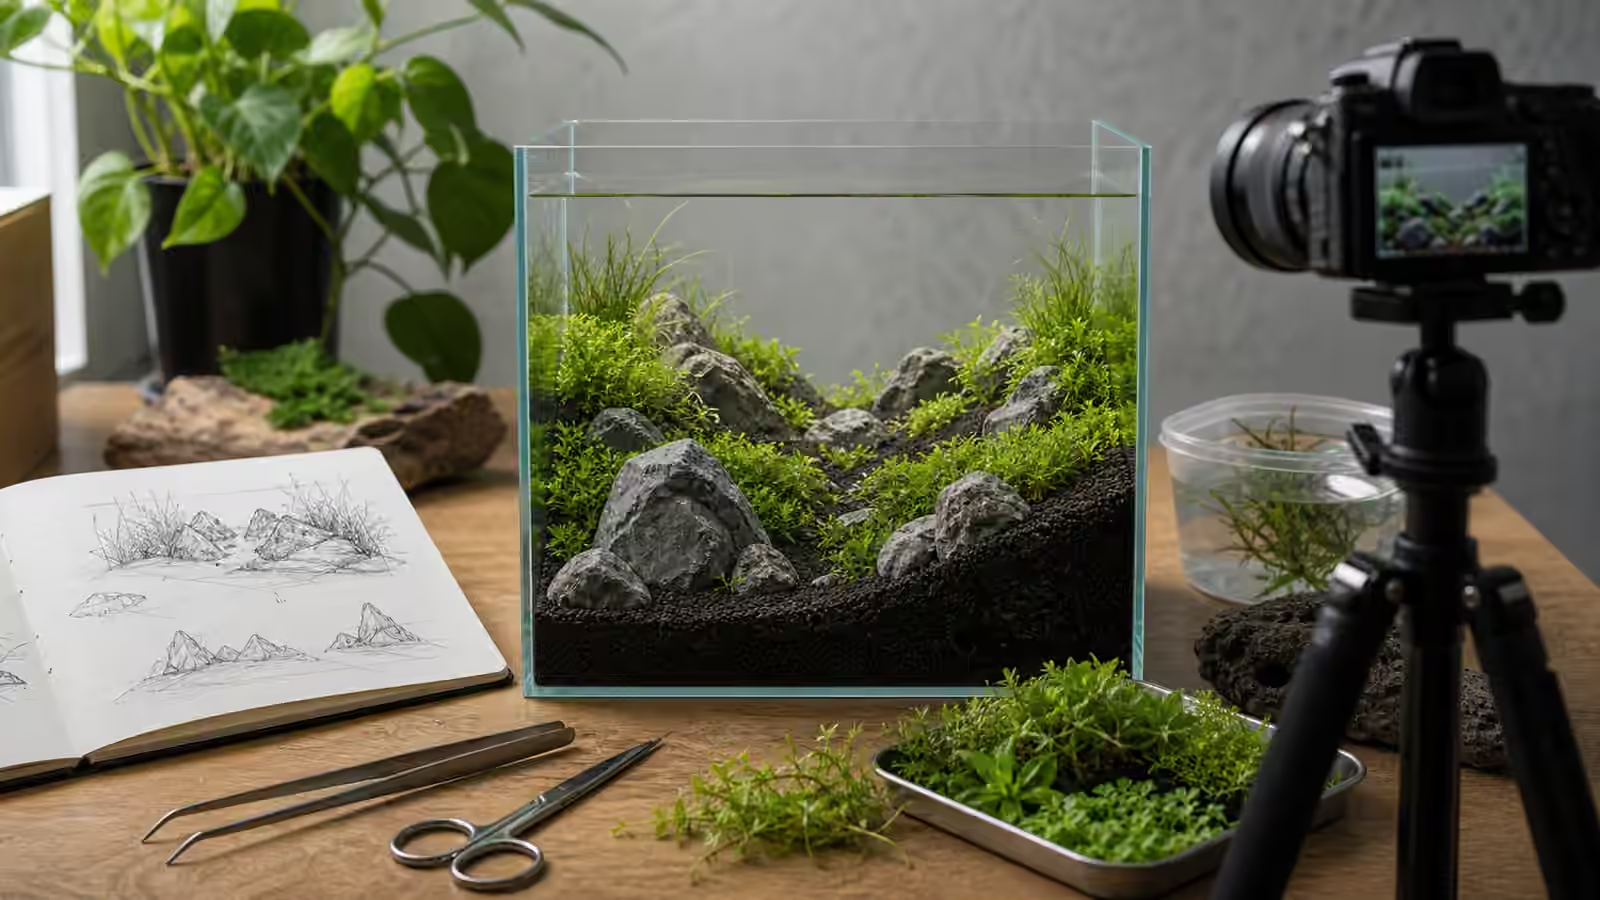
Small aquascapes do not fail because they are small. They fail when every object is asked to be important at the same distance from the glass. A nano tank can feel deep when the layout gives the eye a path to travel. It can also feel cramped when rocks, wood, plants, equipment, and livestock all press against the front pane with no quiet space between them.
Depth is not a trick for photographs only. Planning sightlines can also be a chance to leave room for cleaning, equipment, and the animals that will use the tank. Those benefits depend on the actual layout and the species kept, not on how large the tank appears. The goal is to use the limited footprint with intention.
Heads up
Small tank boundary
Visual depth does not increase water volume, stocking capacity, oxygen reserve, or maintenance forgiveness. Keep the welfare limits from nano and small-tank planning separate from the visual design.
Start With The Viewing Angle
Before moving substrate or stone, decide where the tank will usually be viewed from. Many aquascapes are built as if the viewer is centered and standing, then placed on a desk where the viewer is seated and slightly to one side. That mismatch changes everything. A stone that looked dramatic from above may block the whole midground from the chair. A path that seemed centered may disappear behind wood.
Photograph the dry layout from the real viewing position. This is the cheapest composition tool in the hobby. The camera flattens the scene, which makes confusing shapes easier to see. If the photograph reads as a wall of equal objects, the eye in the room will probably feel the same. This habit builds on Aquascape Composition Rules That Actually Help , where focal point and negative space are treated as maintenance tools, not just art terms.
The main viewing angle does not mean every other angle can be ignored. A tank near a walkway, sofa, or kitchen counter may need side views that do not look like unfinished backs. Still, one angle should lead. When every side gets equal priority, a small tank often becomes crowded because the aquascaper tries to hide all structure from all directions at once.
Slope Gives The Eye Somewhere To Go
Substrate slope is one way to create depth, but it must be practical. A gentle rise from front to back can make the rear of the tank feel farther away and provide more substrate for rooted plants behind the foreground. Tropica’s hardscape guide illustrates this rearward slope. A diagonal rise can lead the eye toward a focal point. A low foreground creates visual breathing room and can leave the front glass easier to clean.
The problem is that slopes move. Digging animals, siphons, planting tools, water flow, and gravity can all soften a bank. Stable stones or wood can help retain a grade, but do not rely on loose substrate to support a heavy rock. Place the main stones on a stable base before building substrate around them, and check that they cannot shift if animals dig nearby. A slope that remains attractive after settling is better than a steep bank that needs constant repair. Hardscape Layout Basics covers stability and filling.
Use depth, not just height. A tall mound pressed against the front glass can look bulky rather than deep. A lower foreground, midground transition, and slightly raised background usually read better in a small tank. If you want a path, let it narrow as it moves back. If you want an island, leave enough open water around it that the viewer can understand where the island ends.
Scale Changes Need Consistency
Forced perspective works when larger textures sit nearer the viewer and finer textures sit farther back. Larger foreground stones, smaller background stones, broad leaves near the front, and finer leaves behind can all help a tank feel deeper. The effect breaks when scale changes are random. One huge background rock or one giant leaf at the rear can pull the back wall forward again.
Plant texture is especially useful because plants grow. Fine stems or small-leaved plants in the background can suggest distance; trim them as needed to keep the intended gaps visible. A broad Anubias leaf near the front can provide a contrasting foreground, but leave room for its mature size and keep its rhizome exposed when attaching it to rock or wood. Tropica’s planting guide explains how to place rhizome plants. Choose plants for the light and care the tank can provide, then use texture as a design tool.
Livestock scale matters too, but appearance is not a stocking guide. Check adult size, behavior, swimming space, cover, water conditions, and compatibility before choosing fish, shrimp, or snails. Small animals are not automatically suitable for every nano tank. Use Stocking Caution for Small Tanks before choosing animals for the scene.
Negative Space Is Not Empty
Open foreground sand, a clear channel between stones, or a patch of visible substrate can make a small aquarium feel intentional. Beginners often fill every visible gap because the tank looks unfinished on day one. Then plants grow, moss thickens, floaters shade the surface, and the layout loses its shape. The space that felt empty at setup becomes the space that saves the composition later.
Negative space can also protect maintenance. A clear front edge gives you room to wipe glass without shredding leaves, while an open path makes settled debris easier to see and reach. A gap behind hardscape may help circulation, but it does not guarantee it: check water movement once the filter is running and again as plants grow. The same open area that gives the eye rest can give the siphon, scraper, and trimming scissors room to work. Open Sand Paths and Foreground Space covers keeping that space usable.
If the tank feels too bare, ask whether it is truly empty or simply young. A foreground carpet, moss pad, or stem group may spread or grow taller, depending on the species and conditions. Designing for the mature tank is part of the patience described in Planted Aquarium Without Panic . Leave room for growth and regular trimming rather than trying to make every area look finished immediately.
Hide The Back Without Building A Wall
Background planting is not the same as blocking the rear glass with a single green sheet. A small tank can gain depth from layered plant heights, but it loses depth when the back becomes a flat hedge. Stagger stems. Leave small pockets where hardscape or darker shadows show through. Use midground plants to bridge the transition from open foreground to taller background instead of making three rigid bands.
Equipment complicates this choice. Filters, heaters, intakes, and tubing often sit at the back, and hiding them is tempting. Do not block flow or make maintenance impossible for the sake of a cleaner photograph. A plant screen that can be trimmed is better than a tangled jungle around an intake. The layout should let you remove a sponge guard, check a heater, or clean a tube without dismantling the aquascape.
Dark backgrounds can help equipment recede, but they do not solve crowding. If a black filter intake is still the dominant shape, use plant placement, hardscape angle, and viewing distance to reduce its importance. The eye accepts practical equipment more easily when the rest of the composition has a clear focal point.
Try A Small Layout
In an empty tank, try one stable stone group off center, with a lower open area beside it. Build a modest substrate rise behind the group, then place a few smaller stones farther back in a similar direction. Sketch taller, fine-textured plants behind the stone and a smaller midground group along one edge. Leave the open area broad at the front and let it taper toward the rear; it does not need to reach the back glass to suggest distance.
Photograph this arrangement from the usual seat, then move the smaller stones and compare a second version. Check from above that the apparent path is not blocked, and test whether your scraper, siphon, and tweezers can reach the spaces you plan to maintain. Place equipment or a same-sized placeholder in the tank while checking access. Adjust the design for the intended animals’ real swimming space and cover, even if that makes the visual path less dramatic.
Fill slowly onto a clean plate or bowl to reduce disturbance, then check the slope and hardscape again underwater before adding animals. Once the filter is running, observe flow around the layout and adjust it to suit the inhabitants; keep the intake and outlet accessible. Hiding Equipment Without Hurting Flow has more on these tradeoffs.
Photograph To Learn, Not To Perform
Taking progress photos is useful because it reveals flattening before your eye adapts to it. Photograph the tank after planting, after the first trim, and after a month of growth. Compare whether the main shape is clearer or more confused. If the layout loses depth, the answer is usually not to buy more hardscape. It is often to trim, thin, open a sightline, lower a foreground mass, or remove a competing piece.
Use the camera gently. A tank that only looks deep from a low, close, carefully cropped photo may still feel crowded in the room. The photograph should help you edit the real tank, not replace it. Aquascape Photo Journal is useful here because it treats pictures as records of growth and decisions rather than as proof that every stage must be display-ready.
Depth in a small aquascape can come from one leading focal shape, a manageable slope, controlled scale, open space, and layered planting. Revisit the view after growth and maintenance, and keep the arrangement that works in the room and remains accessible in practice.