Filter Media Maintenance Without Losing the Cycle
Clean planted aquarium filter media without stripping useful bacteria, shocking livestock, clogging flow, or turning routine maintenance into a cycle problem.
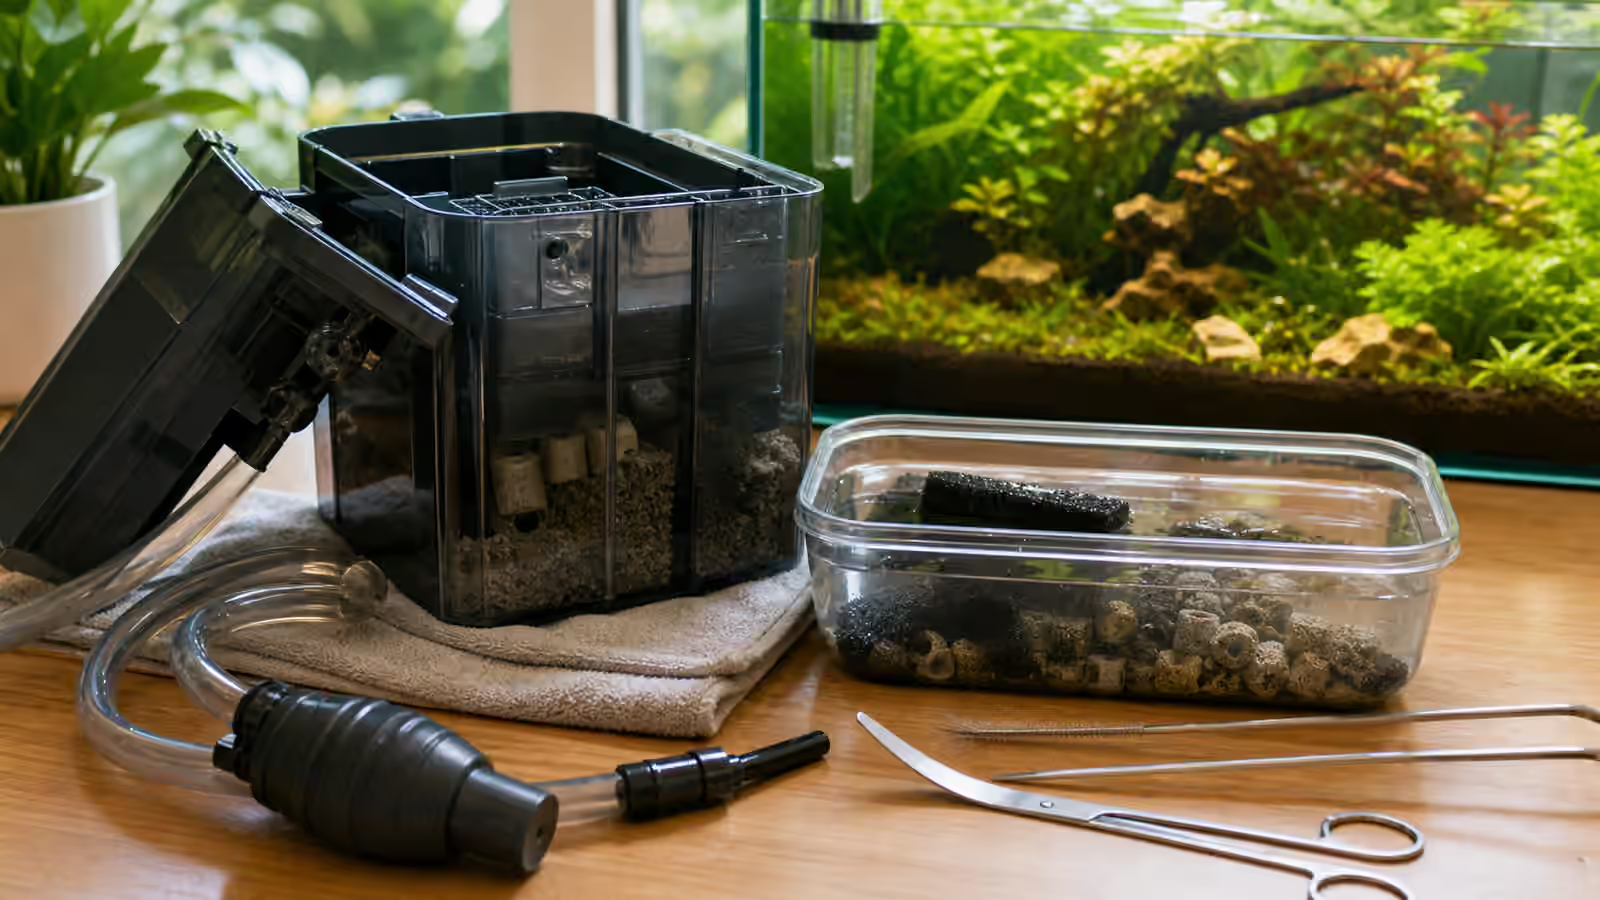
Filter maintenance is easy to underestimate because the work happens inside a box, sponge, cartridge, or canister rather than in the visible aquascape. The plants, stones, and fish draw the eye, but the filter quietly moves oxygen and waste through living surfaces. If flow slows, debris settles. If every useful surface is scrubbed clean at once, the tank can lose part of the biological stability that made it look effortless.
The goal is not to keep a filter pristine. A mature planted aquarium is full of biofilm, mulm, roots, and bacteria. The goal is to keep water moving through the media while preserving enough living surface that the tank does not have to rebuild from a hard reset. That is the same practical thread that runs through The Nitrogen Cycle Without Mystery : useful bacteria need time, oxygen, and surfaces. Filter cleaning should respect all three.
Heads up
Filter care boundary
With dry hands, unplug aquarium equipment before putting your hands in the water or servicing the filter. Keep electrical parts dry and follow each device’s instructions. If a plug or outlet gets wet, do not touch it; shut off power at the circuit breaker and get qualified help. If a filter shocks, overheats, leaks, or will not restart reliably, stop using it and seek qualified help.
What Filter Media Is Actually Doing
Many beginners think of filter media as a dirt trap. It does trap particles, but that is only part of the job. Sponge, ceramic rings, coarse pads, and similar media also provide surfaces for microorganisms that convert ammonia to nitrite and then nitrate. They need oxygenated water flowing past them. In a planted tank, those surfaces work alongside substrate, hardscape, plant leaves, and glass. The filter is important because water is deliberately pulled across it again and again.
A single sponge can perform both mechanical and biological filtration, even if it is sold primarily as a particle trap. The Merck Veterinary Manual describes these filtration functions and the oxygen needs of a biological filter.
That repeated water movement is why media should not be treated like a disposable household filter unless the product design truly requires replacement and the tank has another mature biological surface to lean on. Throwing away every cartridge or pad on a schedule can remove more stability than the tank expects. If a cartridge contains both mechanical floss and carbon, the aquarist may be forced into replacement more often than ideal. In that case, it is worth planning a transition toward reusable sponge or ceramic media where the filter allows it.
Mechanical debris still matters. A sponge packed with fine waste cannot pass water well. A canister full of sludge may lose flow, oxygen, and reliability. The point is balance. Clean enough to restore flow. Leave enough seasoned material to preserve the biological filter.
Clean In Tank Water, Not Under The Tap
The usual planted tank habit is to clean biological media in water removed from the aquarium during a water change. This avoids exposing it to chlorine or chloramine that may be present in untreated tap water. The Ornamental Aquatic Trade Association recommends using removed aquarium water for filter cleaning.
- Observe the animals and normal outlet flow first. Prepare a clean aquarium-only container and towels, then unplug the equipment with dry hands.
- Remove some aquarium water into the container during the planned water change. Open the filter according to its manual and keep the media wet in that water while you work. Keep the interruption to circulation short.
- Gently squeeze sponge or swish ceramic media in the container until loose debris comes away and water can pass through. Do not use soap or detergents.
- Reassemble and prime as the manufacturer directs, refill the tank with suitably conditioned, temperature-matched water, and restart. Check flow and leaks before putting the tools away. Discard the dirty rinse water rather than pouring it back into the aquarium.
The water may turn brown. That does not mean the media is ruined. It means trapped material is leaving. Do not scrub the sponge until it looks new; staining alone is not a reason to replace it. Appearance cannot tell you how much biological capacity remains. Ceramic media should be swished gently rather than polished. Even a fine pad can carry bacteria, so consider what other mature media will remain before replacing it.
Avoid soaps, detergents, kitchen sponges, scented towels, and household buckets. Aquarium tools should stay boring and dedicated. This overlaps with Cleaning Glass and Aquarium Tools , because contamination risk often enters through ordinary household habits rather than through exotic aquarium mistakes.
Do Not Clean Everything On The Same Day
Filter cleaning becomes riskier when it is bundled with every other disturbance. A full substrate vacuum, huge plant uprooting, media replacement, heavy trimming, and livestock addition in the same window create a confusing recovery period. If ammonia or nitrite appears later, it becomes hard to know which change mattered.
For a stable planted aquarium, stagger the larger jobs. Clean the filter media when flow is actually reduced or the maintenance rhythm calls for it, but avoid doing a deep filter clean on the same day as a major rescape. If the tank has just been disturbed, the filter is one of the pieces you want to keep familiar. Rescape Without Crashing the Tank treats wet, seasoned media as a priority for exactly that reason.
This does not mean a filter should be ignored during a messy rescape. If the intake clogs with plant fragments or the impeller stops, respond. The point is to separate necessary flow protection from casual over-cleaning. The filter’s living surface is not decorative grime. It is part of the tank’s safety margin.
Read Flow Before Reading The Calendar
Some filters need attention more often than others. A shrimp tank with a sponge prefilter, heavy moss, and powdered foods may clog quickly. A lightly stocked low-tech tank with open planting may run longer between cleanings. A canister with a fine polishing pad may slow before the biological media needs attention. A hang-on-back filter may show reduced waterfall flow, rattling, or bypass around clogged media.
Watch the tank. Leaves should move gently where flow is expected. Surface film should not become a permanent skin. Debris should not collect in the same dead corner every day. Fish should not be forced to fight a blast after cleaning, either. Filter Flow and Surface Agitation is the broader guide to the pattern you are trying to restore.
When flow changes suddenly, check simple causes first. Plant leaves may block the intake. A prefilter sponge may be packed with debris. The impeller may need gentle cleaning. Tubing may be kinked or narrowed by buildup. Restoring flow does not always require tearing apart every basket of media.
Reassembly Is Part Of Maintenance
A filter is not maintained until it is running normally again. Before closing it, confirm that media is seated in the correct order for that filter, seals are clean, tubing is attached, and no cord or hose is positioned to drip water toward an outlet. After restarting, stay nearby long enough to watch for leaks, odd sounds, trapped air, and weak flow.
Canister filters deserve particular patience because they can trap air and may need priming. Hang-on-back filters may need water added to the chamber before the impeller catches. Sponge filters may need the airline reconnected and the pump checked. The safest routine is unglamorous: towel nearby, hands dry before touching plugs, drip loops respected, and the tank observed after everything looks finished.
After a modest rinse in a stable mature tank, observe the animals and flow. After a larger disturbance, accidental media replacement, or livestock stress, test ammonia and nitrite and monitor daily while readings are unstable. If either is detectable in a stocked tank, promptly make a partial water change with suitable conditioned, temperature-matched water, retest, and reduce feeding while investigating. If animals are distressed, increase aeration and seek aquatic veterinary or experienced specialist help promptly. A long-neglected tank with substantially different tank and source-water pH needs experienced advice on gradual correction; a sudden pH rise can make existing ammonia more toxic. Water Testing for Aquascapes is useful here because it treats tests as trend evidence, not as a ritual performed without interpretation.
Replace Media Slowly When Replacement Is Needed
Sometimes media really does need replacement. A sponge can crumble. A cartridge can fall apart. Fine floss can become unusable. Chemical media can be exhausted or no longer part of the plan. The safer habit is to avoid replacing all biological media at once. If the filter design allows it, run old and new media together in the filter so water passes through both and the new surface can become colonized. If the filter is cramped, consider adding a compatible extra sponge filter and running both before the old piece fails. Do not pack a chamber so tightly that water bypasses the media or flow is restricted; follow the filter manual. There is no reliable universal number of days that proves the new media is ready on its own. Replace in stages where possible, and check ammonia and nitrite after each substantial change. If the old media must be removed immediately, monitor daily and respond to detectable readings as described above.
Manufacturers may recommend frequent cartridge replacement, but planted tanks benefit from thinking in functions. Mechanical media catches particles. Biological media houses bacteria. Chemical media adsorbs specific substances for a limited time. When one product tries to do all three, replacement advice can become awkward for a living aquarium. The aquarist has to protect the cycle while following the equipment and media instructions. The Fluval 07 series manual , for example, recommends staggering changes and rinsing biological media in aquarium water; consult the manual for your own model. Activated carbon and other chemical media have their own replacement instructions and cannot be restored by rinsing. A combined cartridge may also be an established biological surface, so plan a transition before discarding it.
Good filter maintenance leaves the tank boring afterward. Flow returns. Water clears from the brief disturbance. Livestock behave normally. The filter starts without drama. Nothing smells burnt, leaks, or rattles. The aquascape does not need a rescue plan because the hidden equipment was handled with the same restraint as the visible plants.
Common Mistakes
- Waiting until flow stops before checking a clogged intake or prefilter.
- Assuming a sponge is only mechanical media and replacing it along with every other mature surface.
- Cleaning media with untreated tap water or household detergents.
- Packing new media so tightly that water cannot follow the intended path.
- Walking away before the filter is primed, running, and checked for leaks.
Related Fondsites Path
- Maintenance Day Checklist for an order of work from observation through restart.
- Dechlorinator and Source Water Basics for preparing replacement water.
- Power Outage Plan for a Planted Aquarium for a longer interruption to filtration.
Try This Next
At the next water change, note the normal outlet flow and inspect the intake. If cleaning is needed, rinse only the affected media in removed tank water, then record what you cleaned and whether flow returned. Use that record to judge when the filter next needs attention.
Sources
- Merck Veterinary Manual: Aquatic Life Support System Components explains mechanical, biological, and chemical filtration and the needs of nitrifying bacteria.
- OATA: How to Set Up and Look After a Freshwater Tank covers filter checks and rinsing in removed aquarium water.
- Fluval 07 Series Manual provides a model-specific example of media care, staggered replacement, and safe servicing.
- Merck Veterinary Manual: Management of Aquarium Fish discusses ammonia, nitrite, biofiltration, and the care needed with old tank syndrome.