Gravel Vacuuming Around Planted Substrate
Clean debris from planted aquarium substrate without uprooting plants, stripping beneficial biology, collapsing slopes, or turning maintenance into a full rescape.
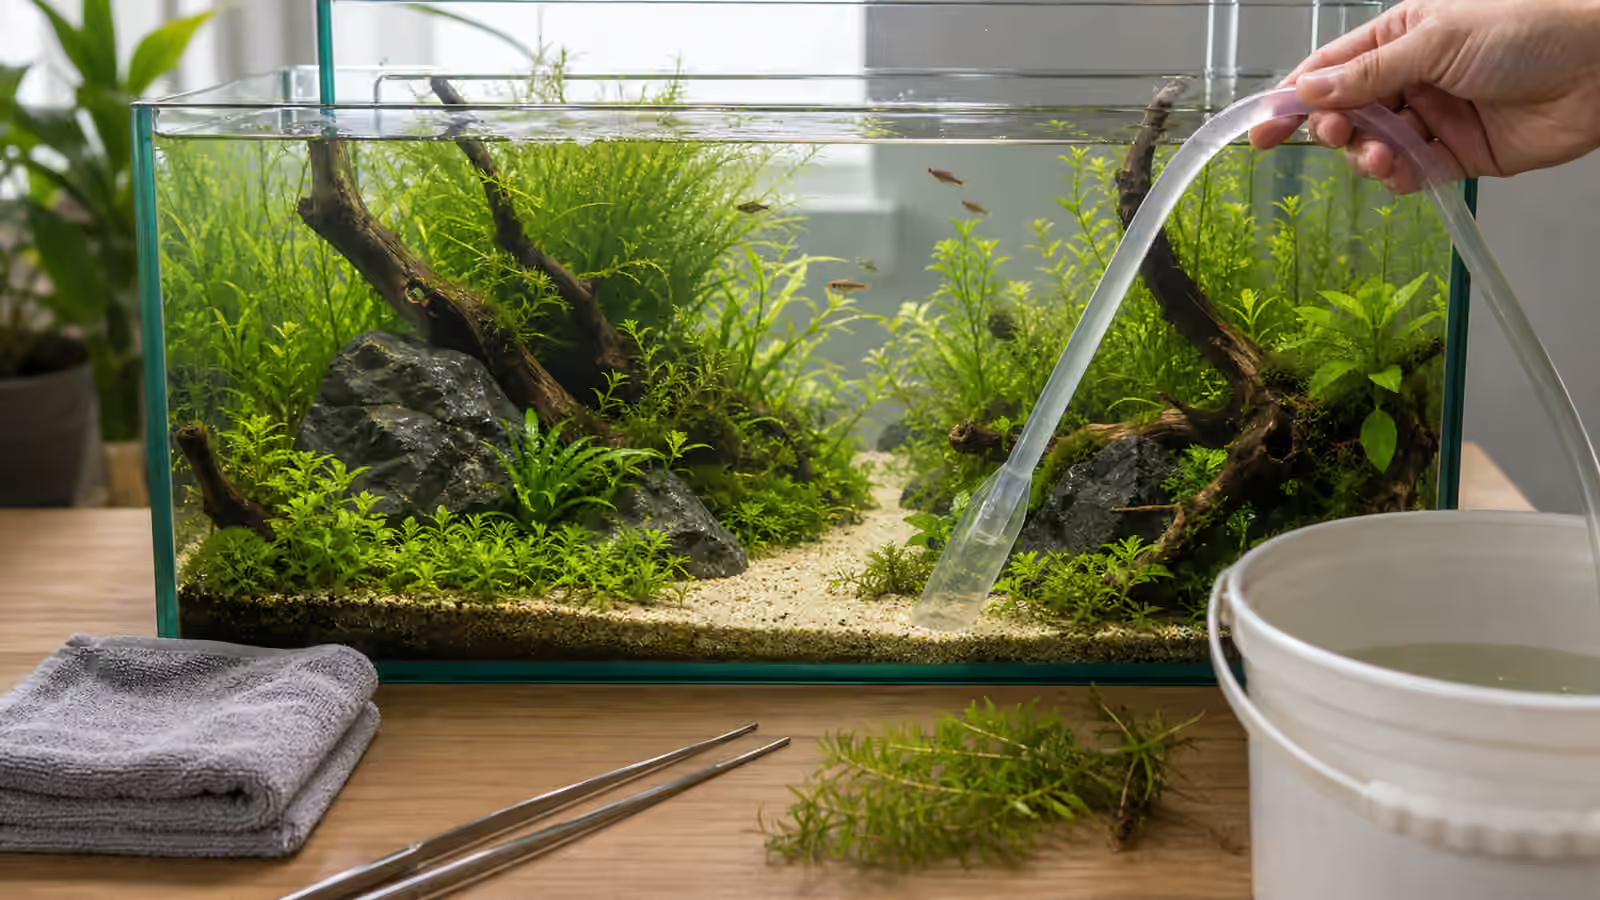
Gravel vacuuming is simple in an empty aquarium and confusing in a planted one. The old advice says to push the siphon deep into the gravel and lift out trapped waste. A planted aquascape has roots, sloped substrate, active soil, carpeting plants, delicate stems, root tabs, beneficial bacteria, and hardscape that was arranged for both beauty and stability. Treating that bottom like a bare gravel box can uproot plants, flatten the layout, and release more mess than it removes.
Planted tanks still need debris management. Fish waste, old leaves, uneaten food, plant trimmings, and mulm collect where water slows. The goal is not to sterilize the substrate. Remove excess material before it accumulates or decays, while leaving roots and substrate structure mostly undisturbed. A little mulm is normal; a clear-looking bottom alone does not establish good water quality.
Heads up
Maintenance boundary
Do not dig aggressively through active substrate, root tabs, deep planted areas, or unstable slopes. If animals are distressed, address their immediate needs and test the water rather than continuing a routine clean. A rotten smell or persistent bubbling warrants investigation, not a deep stir of the entire bed.
Read Where Debris Actually Goes
Before starting the siphon, look at the tank. Debris follows flow. It gathers behind stones, under driftwood shadows, at the base of dense stems, near intake dead spots, in foreground valleys, and along the front glass where the aquarist can see every speck. A planted tank teaches you its debris paths if you look before your hand enters the water.
That observation connects to Filter Flow and Surface Agitation . If the same corner always collects waste, the answer may not be deeper vacuuming. It may be a small outlet adjustment, a trimmed plant wall, a cleaner feeding routine, or a hardscape gap that allows water to move. Siphoning is easier when the tank is not designed to trap dirt.
Debris is not always bad. Mulm can be part of a mature planted tank’s biology, especially under plant cover and around roots. The visible excess is the issue: piles of old food, rotting leaves, thick sludge on top of sand, or material collecting against plant crowns. Remove what is causing problems. Leave the substrate structure that plants are using.
Hover, Pinch, And Lift
In planted substrate, the siphon often works best as a hovering tool. Hold the tube just above the surface so light debris lifts while heavier substrate stays down. You can gently pinch the hose to reduce flow when working near delicate plants or fine sand. If a plant starts to lift, release suction or move away rather than pulling harder.
Open sand paths can handle a little more direct cleaning because there are fewer roots. Even there, avoid flattening the path every week if it is part of the aquascape design. A light skim may be enough. In planted zones, use the siphon like a small vacuum above a carpet, not like a shovel.
Tweezers help before the siphon. Remove loose leaves, old stems, and large debris by hand so they do not clog the tube or tear plants as they pass. Trimming and Replanting Planted Tanks pairs well with this habit because trimming day creates debris that should be removed before it drifts behind the hardscape.
For fine sand or lightweight soil, start higher above the surface and lower the intake gradually until debris moves. If grains rise into the hose, lift the intake or pinch the flexible hose until they fall back. A narrower hose or a siphon with a flow control can make a small tank easier to clean, though it may clog more readily. A baster can dislodge debris from a tight spot; catch the suspended material with the siphon rather than simply blowing it elsewhere.
Rooted Plants Need A Softer Hand
Rooted plants change the cleaning standard. Crypts, swords, stem bases, and rooted foreground plants build stability in the substrate. Plunging a siphon into their roots can set them back or expose nutrient-rich layers. If root tabs are in use, deep vacuuming can pull nutrients into the water column or scatter fragments where they do not belong.
Root Tabs and Root-Feeding Aquarium Plants explains why root zones matter. A root tab is meant to feed the plant through the substrate, not become a cloud of fertilizer in the water. Marking or remembering root-tab locations helps you clean around them without disturbing them.
Plant crowns are worth special attention. Debris packed around a crown can encourage rot or block new growth. Use gentle flow from a turkey baster, pipette, or small siphon to lift the material away, then remove it from the water. Do not solve crown debris by burying the crown deeper. Planting depth matters, and a buried crown can create a worse problem than the loose mulm you noticed.
Active Soil And Layered Substrate
Active aquarium soils and layered substrates ask for restraint. Many are designed to stay mostly in place. Crushing granules, mixing capped layers, or pulling nutrient-rich material to the surface can cloud water and change nutrient behavior. A newly set up soil tank may release dust or organics at first, but routine maintenance should not churn it every week.
If the substrate is capped, protect the cap. A cap of sand or gravel over a richer layer works only while the layers remain meaningfully separate. Deep vacuuming can mix them. In a display with livestock, that kind of disturbance may create water-quality issues. Substrate for Aquatic Plants is the broader planning guide because cleaning habits should match the substrate you chose.
Slopes also need protection. Aquascapes often use substrate height to create depth. A careless siphon can flatten weeks of planning by pulling the high rear slope forward. Clean slopes from above with light suction, and avoid creating a channel that will keep sliding. If the slope collapses repeatedly, the hardscape support or plant rooting strategy may need adjustment.
Feeding Habits Make Vacuuming Easier
The easiest waste to remove is the waste that never enters the tank. Overfeeding creates substrate cleaning problems, especially in planted aquariums with dense foregrounds or shrimp-safe hiding spaces. Food that falls into moss, root tangles, or behind stones can decay before animals find it. The aquarist then blames the substrate for what began as a feeding routine.
Feeding Without Polluting the Tank is the best companion here. Feed where you can observe, use amounts that animals finish, and remove excess when possible. Feeding dishes can help in shrimp tanks or tanks with messy foods, but they must be cleaned too. A dish that holds old food is not cleaner than substrate.
Stocking also matters. A tank packed with fish beyond its filtration and maintenance capacity will generate more waste than a careful scape can quietly absorb. Stocking Caution for Small Tanks keeps the maintenance reality attached to animal choices.
Water Changes And The Siphon Window
Gravel vacuuming usually happens during a water change because the siphon is already removing water. That creates a time limit. If you try to clean every corner during a small water change, you may rush and damage plants. If you extend the session too long, temperature, water level, and livestock comfort can become concerns.
Choose zones. One week may focus on the front sand path and intake corner. Another week may focus on the space behind wood after trimming stems. A mature planted tank is maintained in passes, not demolished and rebuilt every water change. Water Change Rhythm for Planted Tanks supports this slower pattern.
Prepare the exit path. Keep towels ready, secure the bucket, and manage the hose so it does not whip around the room or pull hardscape when you move. Water Damage and Leak Prevention may seem unrelated until a siphon slips and the maintenance day becomes a floor problem.
For a routine session:
- Prepare. Observe the animals, take any planned water tests, and mark the amount to remove in an aquarium-only bucket. Prepare replacement water that suits the inhabitants, matched for temperature and treated for chlorine or chloramine as needed.
- Make equipment safe. With dry hands, unplug equipment before working in the water. Unplug the heater before draining and follow its cooling and restart instructions. Keep the interruption to filtration and water movement short.
- Start and control the siphon. Put the outlet in the secured bucket below the tank and use the siphon’s pump or manufacturer-recommended priming method. Keep a hand on the intake and watch both ends; do not leave it running unattended.
- Clean selected spots. Hover over loose debris, working away from roots and watching for fish, shrimp, and snails. A fine intake guard can reduce the risk of drawing in small animals, but check it for clogs and do not rely on it as a substitute for watching.
- Stop, check, and refill. Stop at the planned amount, even if some areas remain. Check the bucket for accidentally siphoned animals before disposal and return them gently. Refill slowly with prepared water, restart equipment according to its instructions, and confirm flow, temperature, and no leaks. The Maintenance Day Checklist covers the full routine.
When Not To Vacuum
There are times to skip substrate disturbance. After planting fresh stems, give roots time to settle. After a major rescape, let cloudiness and biology stabilize unless debris is clearly rotting. During fish stress, focus first on water parameters, oxygen, temperature, and equipment. In a dry-started or newly flooded carpet, aggressive vacuuming can lift plants before they anchor.
This does not mean neglecting the tank. It means choosing the least disruptive tool. Use tweezers, a small hose, a baster, or a partial water change focused on the water column. Remove obvious decay without stirring every layer. Dry-Start Method Planning is a good reminder that root establishment can be fragile during transitions.
If the substrate smells foul, releases persistent gas when lightly disturbed, or has black pockets under failing plants, stop disturbing that area. Bubbles or dark substrate alone do not identify the cause. Check livestock, filter flow, temperature, ammonia, and nitrite; review feeding and accumulated debris. If ammonia or nitrite is detectable, respond promptly with suitable conditioned, temperature-matched water, retest, and investigate the cause. If animals are gasping or otherwise distressed, increase aeration and seek aquatic veterinary or experienced specialist help promptly. Long-neglected tanks with very different tank and source-water chemistry need particular care; see the water-change guide before making a large correction.
A Clean Enough Bottom
A planted aquarium bottom will not stay spotless, and it should not be judged by bare-tank standards. Some mulm, root growth, and organic settling are part of the living system. Clean enough means plants are not smothered, excess food and decaying leaves are removed, and the aquascape still reads clearly. Observe the animals and test the water as well; appearance alone cannot reveal ammonia or nitrite.
The best vacuuming routine is light, observant, and repeatable. Read the debris paths, skim the surface of the substrate, protect root zones, clean open areas more than planted zones, and adjust flow or feeding when the same problem returns. When maintenance respects the plants, the substrate becomes a support system rather than a battlefield.
Sources
- Merck Veterinary Manual: Essential Maintenance outlines observation, testing, water changes, plant care, and substrate debris removal.
- Fluval: Aquarium Soil Substrates describes light siphoning above soil and cautions against cleaning it like gravel; follow the directions for your own substrate.
- University of Florida IFAS: Ammonia in Aquatic Systems explains testing, reducing feeding, and water changes with an appropriate source as responses to ammonia.