Maintenance Day Checklist
Run planted aquarium maintenance days with observation, testing, water changes, trimming, filter care, equipment checks, and cleanup in a repeatable order.
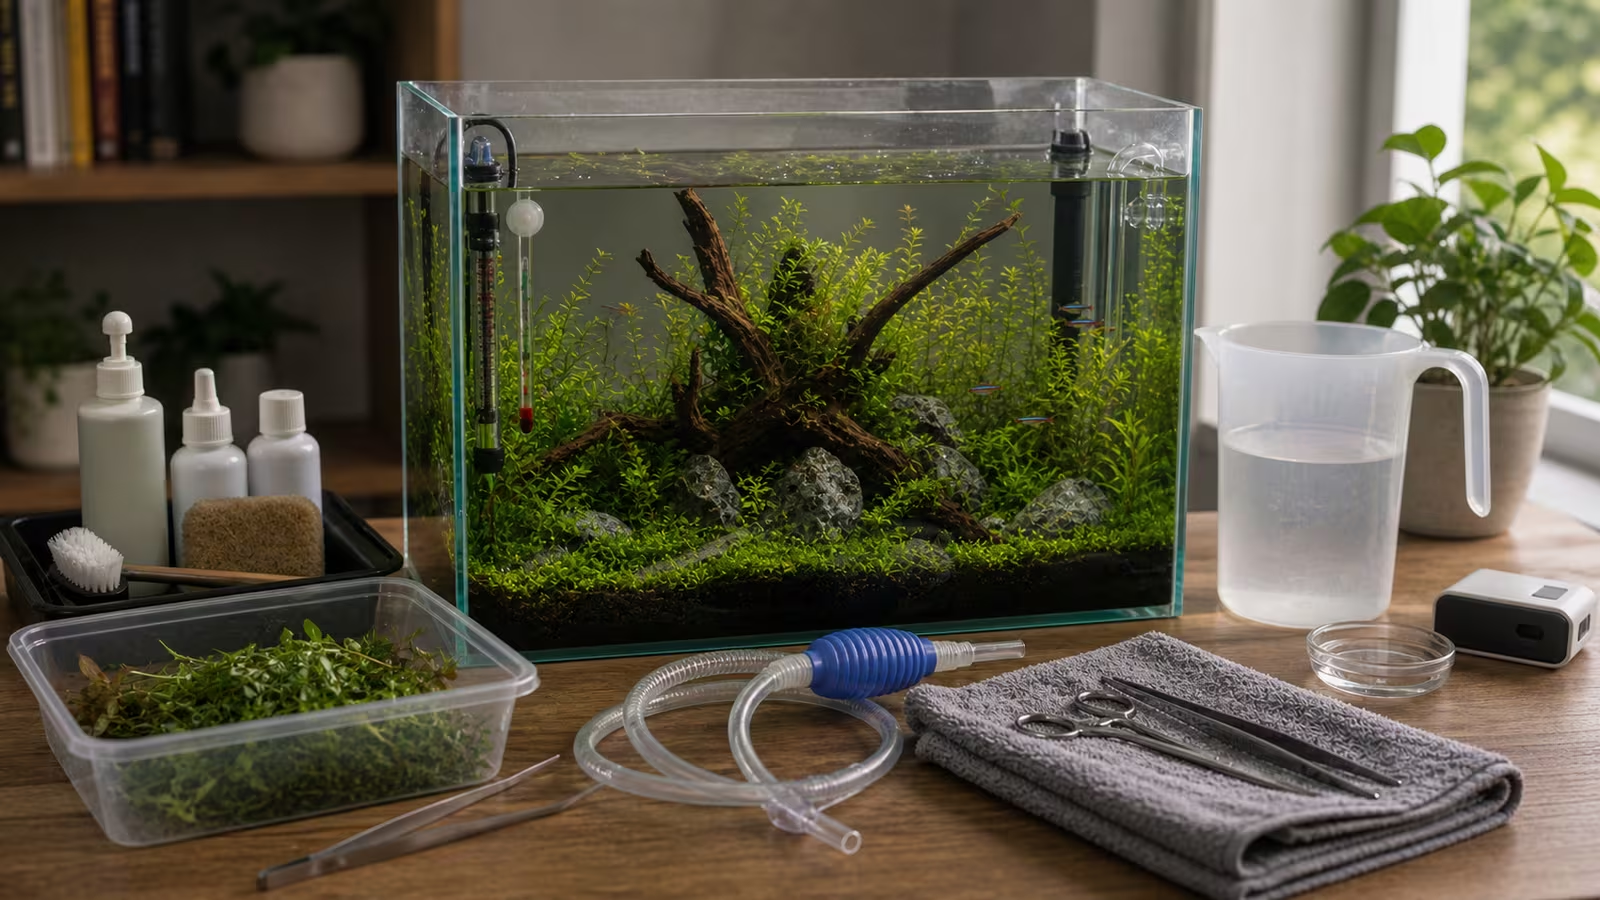
Maintenance day should feel boring in the best way. A planted aquarium becomes easier to manage when observation, water changes, trimming, filter care, and cleanup happen in a repeatable order. The checklist reduces missed details: a heater left unplugged, a filter sponge washed too aggressively, or a spill near power.
Use this as a routine for an established freshwater planted tank, not a fixed schedule for every aquarium. Water-change volume and frequency depend on the tank and its inhabitants; filter cleaning and trimming are jobs to do when needed, not automatically every time. See Water Change Rhythm for Planted Tanks for choosing a starting routine.
Heads up
Maintenance safety boundary
Keep water away from outlets and power strips, control siphons, and never leave draining or filling unattended. Unplug aquarium equipment before putting hands in the water or servicing it, following its instructions. If a plug or outlet gets wet, do not touch it; shut off power at the circuit breaker and get qualified help. If the stand or floor seems unsafe, stop and get help.
Before Disturbing The Tank
Observe the animals first. Notice breathing, hiding, color, appetite, and unusual behavior before your hands enter the water. Check temperature, filter flow, and the area around the tank for leaks. These are also useful daily checks between maintenance days; Merck lists fish, temperature, and equipment checks as daily tasks.
If animals are gasping or otherwise distressed, or a stocked tank has detectable ammonia or nitrite, pause cosmetic work and address the problem promptly. Check circulation and test the water; reduce feeding and seek aquatic veterinary or experienced specialist help, especially if animals are distressed. A partial change with suitable, conditioned, temperature-matched water can help while you investigate. Retest after the change and monitor daily while the biofilter recovers.
For a long-neglected tank, check tank and source-water pH before a large change and get expert help with a gradual correction if they differ substantially. A sudden rise in pH can make existing ammonia more toxic. See Water Change Rhythm for more detail.
On testing days, sample before changing water so the results describe the tank as it was. Ammonia and nitrite checks are especially useful in a new tank or after a major filter disturbance. Record results alongside the date and recent changes; Water Testing for Aquascapes explains which tests help answer different questions.
Prepare aquarium-only buckets and tools, a siphon, towels, a thermometer, and a container for trimmings. Decide how much water to remove and make sure the receiving bucket has room. For example, a 25% change in a tank holding about 40 liters of water is 10 liters; use the water actually in the tank, allowing for displacement by substrate and hardscape. A marked bucket helps repeat the amount.
Prepare replacement water at a temperature close to the tank’s and with chemistry appropriate for its inhabitants. If the supply contains chlorine or chloramine, use a conditioner suited to the disinfectant and follow its label for the volume treated and any contact time. Check the source and treatment details in Dechlorinator and Source Water Basics .
The Maintenance Order
- Observe and test. Check animals, temperature, flow, and leaks; take any planned water sample before changing water.
- Make equipment safe. With dry hands, unplug equipment before working in the tank. Unplug the heater before draining and follow its manual for cooling and restart times. Do not expose or remove a hot heater; never operate it out of water. Keep plugs and outlets dry.
- Remove loose material and trim. Lift dead leaves and excess food, then trim only what needs it. Collect cuttings so they do not clog the intake. Check for small animals among the plants.
- Siphon the planned amount. Watch the hose and bucket throughout. Hover over debris in planted areas instead of digging into roots, soil, or root tabs. Pause suction if an animal approaches, and check the bucket for accidentally siphoned livestock.
- Clean the filter only if needed. If flow or the manufacturer’s instructions indicate cleaning, use some removed tank water to gently rinse the media, as described below. Keep the media wet, reassemble the filter, and keep the interruption to circulation short.
- Refill slowly. Add the prepared water gently to avoid uprooting plants or disturbing the substrate. Top-off replaces evaporation; it is not a substitute for removing and replacing water.
- Restart and verify. Reassemble and prime the filter as its manual requires. Restore power with dry hands once the water level and any waiting periods meet each device’s instructions. Confirm flow, look for leaks or unusual sounds, and check the heater and temperature.
- Finish the job. Wipe spills, check hoses and drip loops, put tools away, and note the amount changed, test results, equipment work, and anything unusual. Recheck the tank and surrounding area after the equipment has been running.
A planted bottom does not need to be churned clean. If the planned water change ends before every patch is done, clean another area next time. Gravel Vacuuming Around Planted Substrate covers gentle siphoning in more detail.
Filter Care
Check flow at each session, but clean media when it needs attention rather than replacing or sterilizing it on a calendar. Beneficial bacteria live on filter surfaces. When biological media needs cleaning, gently swish or squeeze it in water removed from the tank, using a clean aquarium-only container. Keep it wet and follow the filter’s instructions for reassembly. Avoid replacing all biological media at once, and stagger major filter work from a deep substrate clean or rescape when possible.
If flow falls, first check for a blocked intake or prefilter. Clean the intake and impeller as the manufacturer directs; a clogged intake is not a reason to replace healthy biological media. A necessary cleaning should not be postponed just because another job happened recently. After substantial filter disruption or livestock stress, check ammonia and nitrite and respond to the results. Filter Media Maintenance Without Losing the Cycle walks through cleaning and restart checks.
A Useful Maintenance Log
Keep a short entry where you can find it next time: date; temperature and pre-change test results with units; water removed and replaced; conditioner and dose; filter or plant work; and anything unusual about the animals or equipment. For example: “10 L changed; nitrate 20 mg/L as NO3 before change; prefilter rinsed; flow normal after restart.” Record the reading your kit actually reports, including whether nitrate is expressed as NO3 or nitrate-nitrogen, so later comparisons use the same scale.
A log helps reveal a rising nitrate trend or a filter that repeatedly slows down. It does not replace an immediate response to distressed animals or a concerning result.
Common Mistakes
- Starting with a big trim before observing animals or taking a useful water sample.
- Adding untreated or poorly matched replacement water, or counting evaporation top-off as a water change.
- Deep-cleaning filter media and substrate at the same time without a reason.
- Forgetting to restart the filter or heater, or walking away before checking for leaks.
- Using buckets or tools contaminated by household cleaners, or releasing plants and animals outdoors. See Invasive Species Disposal for disposal guidance.
- Skipping notes and then guessing what changed.
Related Fondsites Path
- Water Change Planner for routine sizing.
- Trimming and Replanting Planted Tanks for plant work.
- Heater, Thermometer, and Electrical Safety for equipment checks.
- Keepers Guild for home maintenance habits around leaks and wear.
Try This Next
Print or write a short checklist and keep it with the aquarium tools. Add your usual water-change amount, conditioner dosing rule, and the heater’s cooling and restart instructions. After three maintenance days, remove steps you never use and add the ones you keep forgetting.
Sources
- Merck Veterinary Manual: Essential Maintenance outlines aquarium observation, water testing, water changes, plant care, and filter checks.
- Merck Veterinary Manual: Management of Aquarium Fish discusses ammonia, nitrite, biofilter recovery, and the care needed with old tank syndrome.
- Merck Veterinary Manual: Providing a Home for Fish discusses water quality and chlorine and chloramine in source water.
- Fluval M Series Heater Manual provides an example of heater cooling and maintenance precautions; follow the instructions for your own model.
- Aqueon Submersible Heater Instructions describes drip loops and what to do if a plug or receptacle gets wet.