The Art of the Cheese Plate
There’s a quiet alchemy to assembling a cheese plate: with a few deliberate choices you can make something that feels abundant, intimate, and inevitable. A good plate doesn’t require a dozen cheeses or a professional styling kit. It requires intention.
Think of a cheese plate as a small menu. Your job is to create a beginning (something gentle), a middle (something satisfying and savory), and a moment of drama (something bold). Then you build bridges—crunch, acid, sweetness—so every bite has a path.
This is a practical, sensory guide to composing plates that work for weekend guests, a picnic, or a quiet evening with a good bottle.
If you’re nervous, here’s the calm truth: your guests want to feel cared for, not tested. A great plate is generous, readable, and easy to eat.
A Philosophy of Contrast
A memorable plate balances contrasts—texture, intensity, milk type, and salt. The easiest way to get contrast is to choose cheeses that have different “jobs” on the board.
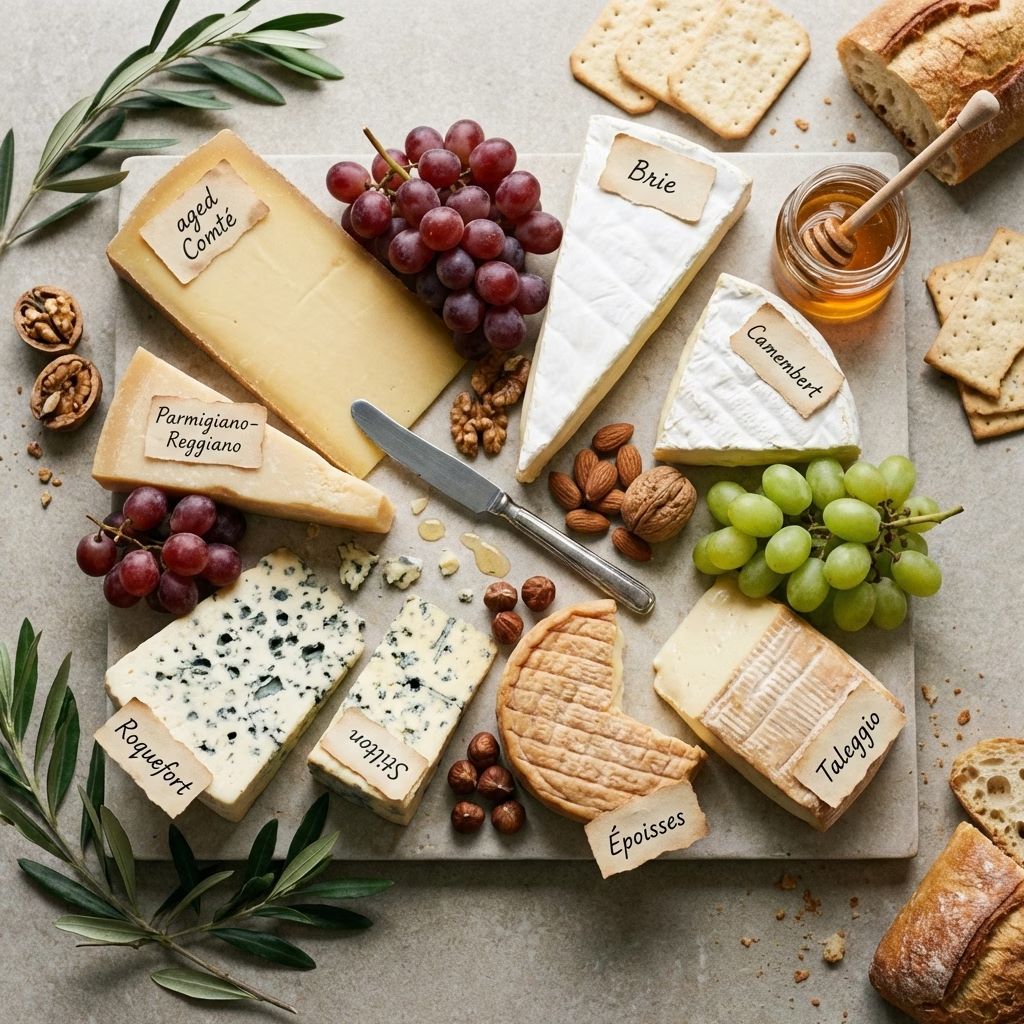
Aim for three to five cheeses that play off one another. Start with something soft and creamy that feels like a welcome (Brie, fresh goat, Saint‑Marcellin). Add something firm and nutty that brings chew and savory depth (aged Gouda, Manchego, Comté). Then include a bright or pungent counterpoint that wakes the palate (feta, aged goat, a blue). If you want a moment of drama, add a washed rind or intensely savory cheese (Taleggio, Époisses) and buy less of it—drama works best in small doses.
Think of the plate as a small landscape: each cheese should have a clear role.
The three jobs (and why they matter)
The simplest way to choose roles is to think in threes. A crowd‑pleaser is creamy or mild and makes everyone feel safe. An anchor is chewy, nutty, or savory and creates satisfaction and structure. A spark is blue or washed‑rind and adds a memorable edge. If you get those three jobs right, the rest is garnish.
A Simple “3-Cheese” Formula (Works Every Time)
If you’re not sure where to start, choose:
- Creamy: bloomy rind or fresh (Brie, chèvre, triple-cream)
- Firm/nutty: aged, sliceable (Comté, Manchego, aged Gouda)
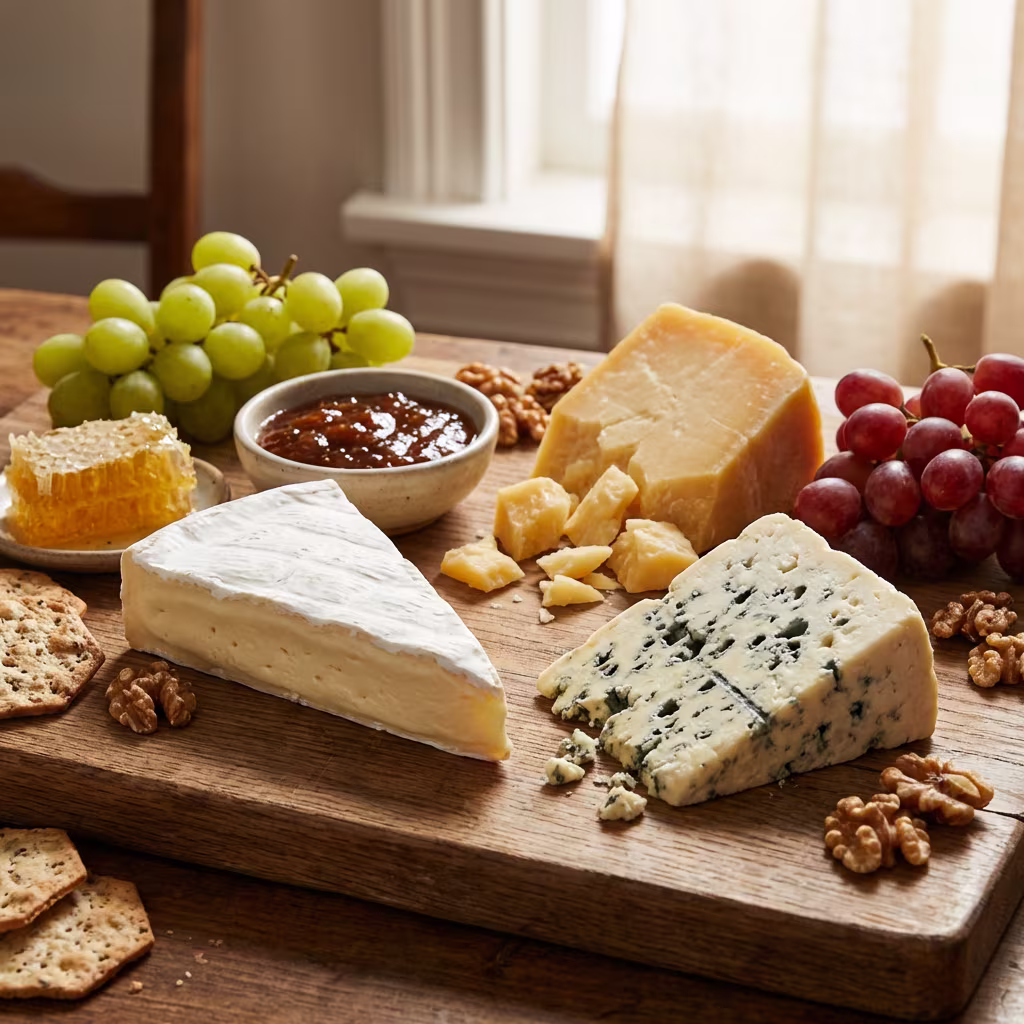
- Bold: blue or washed-rind (Stilton, Roquefort, Taleggio)
This gives you contrast in texture and intensity without needing a dozen items.
If you want to go to four cheeses, add one of these as a “bridge”:
Either add a fresh cheese (chèvre, feta) to bring brightness, or add a crystalline hard cheese (aged Gouda, Parmigiano-style) for crunch and a savory finish. Bridges make bold cheeses feel more approachable, and they give shy cheeses more room to shine.
The Supporting Cast
Cheese on its own is delicious; a few well-chosen accompaniments turn it into a story.
The best supporting cast is small and purposeful. Acid (cornichons, quick pickles, a lemony chutney) cuts richness. Sweetness (honey, quince paste, fig jam) rounds salt and makes blues feel friendlier. Crunch (toasted nuts, seeded crackers) keeps bites interesting. Fresh fruit and vegetables (grapes, pears, radish, apple) add lift. An herb sprig or a drizzle of citrus‑herb oil can make the whole plate feel finished.
Keep the additions simple and complementary—each should have a job.
A simple supporting cast formula
If you’re unsure what to add, use this repeatable set:
Choose one crunchy or starchy base (crackers, baguette, crispbread), one acidic element (cornichons, pickled onions, citrusy chutney), one sweet element (honey, quince paste, fig jam), and one fresh element (grapes, apple slices, pear, radish). That’s enough to make the plate feel complete without turning it into a pantry dump.
That’s enough to make the plate feel complete without turning it into a pantry dump.
Pairing the accompaniments to the cheese
Soft‑ripened cheeses love acid (cornichons, apples) to cut richness. Alpine and aged cheeses tend to love fruit and nuts. Blues love sweetness and bread. Washed rinds usually prefer acid and crunch more than sugar, because sweetness can make them feel heavier rather than clearer.
Assembly—A Step-by-Step Practice
Start with a board with personality (wood for warmth, slate for contrast). Place the cheeses first, spaced out and varied in shape. Then add small bowls for spreads, pickles, or olives so the board has a few “anchors.” Tuck crackers and breads into casual clusters rather than fanning them into a display. Add garnish last—a herb sprig, a small grape cluster, a pinch of flaky salt on a soft cheese—so it looks fresh rather than handled.
Use odd numbers (3–5) for visual balance; leave breathing room so each cheese can be appreciated.
How to make it look abundant without adding more food
Abundance is mostly about spacing and repetition. Cluster items in small groups rather than fanning everything out. Use small bowls to add height and create “anchors” for the eye. Repeat one element in two places (two small grape clusters instead of one giant pile). The board will look fuller and feel more intentional.
The board will look fuller and feel more intentional.
Knives, Cuts, and Rind Etiquette
One knife per cheese is ideal; at minimum, keep blues and washed rinds separate from everything else so the whole board doesn’t drift toward “blue.” Cut soft cheeses into slim wedges from the center so each bite gets rind plus paste. For hard cheeses, shave or break into irregular pieces; it looks generous and it’s often the best texture. Most rinds are edible, but not all are pleasant (wax, cloth bandage, very thick naturals), so offer the choice rather than making it a test.
Cutting cheats that make the board feel effortless
Pre‑cut a few pieces of each cheese so guests don’t have to be the first one to cut. For crumbly cheeses, provide a small spoon or spreader so people aren’t chasing crumbles. For blues, keep a dedicated utensil and treat it like a strong spice: a little goes a long way, and it’s easiest to control when it has its own tool.
Your job is to reduce social friction. A good board is easy to approach.
Quantities (So You Don’t Overbuy)
As a loose guide for a mixed board, plan about 1–1.5 oz (30–45 g) of cheese per person for a snack before dinner, and about 2–3 oz (60–90 g) per person when cheese is the main event.
For variety without waste, buy smaller wedges across styles rather than a huge block of one cheese.
Buying strategy that reduces waste
Buy smaller wedges of the bold cheeses, and make your largest wedge the semi‑hard “anchor” category because it tends to please the most people and hold well. If you’re unsure, tell the monger how many people you’re serving and whether it’s a snack or a meal; good portioning is one of the most valuable services a shop can offer.
Temperature & Timing
Remove cheeses from refrigeration 30–60 minutes before serving. Cold kills aroma and compresses texture; warmth reveals subtleties.
Soft cheeses usually need about 30 minutes; semi‑hard and hard cheeses often need 30–60 minutes. If you’re unsure, err on the shorter side and let the board warm naturally as people snack.
Label cheeses for guests and provide small knives so flavors don’t cross.
If you can’t do anything else, do this. Temperature is the difference between “fine” and “wow.” Cold cheese is muted: aromas are locked, texture is tight, flavors are simplified.
Timing for a stress-free host
If you want a calm hosting rhythm, pull the cheeses and set out the board and bowls about an hour before. Assemble cheeses and bowls around the 30‑minute mark, and keep crackers and bread off until the last 10 minutes so they stay crisp. Finish with fruit, nuts, and herbs right before serving so everything looks fresh.
This prevents soggy crackers and keeps the board looking fresh.
A Quick Pairing Shortcut (Wine/Beer/NA)
For fresh and soft‑ripened cheeses, crisp whites, sparkling wine (or sparkling water), and light beers are friendly. For semi‑hard and hard cheeses, medium‑bodied reds, cider, and amber ales tend to land well. For blues and washed rinds, you can either pair sweetness (sweet/fortified wine, strong ales) or keep the drink dry and add honey or jam on the board as the sweet counterweight.
A practical beverage philosophy
You don’t need the perfect pairing. You need a beverage that doesn’t fight the cheese.
Sparkling wine (or sparkling water) is a universal helper because acid and bubbles reset the palate. Crisp whites and dry cider are friendly with most boards. If you’re pouring red, keep it medium‑bodied and not overly tannic unless you have meat or very aged cheeses to stand up to it.
For non-alcoholic pairing, a lightly sweet sparkling beverage, kombucha, or strong black tea can work surprisingly well.
Seasonal Menus & Pairing Examples
Season can be your quiet assistant. In autumn, aged Gouda with triple‑cream brie, quince paste, and roasted walnuts feels inevitable with a late‑harvest wine or a red blend. In summer, fresh goat with young Gouda, honeyed figs, and marcona almonds loves a crisp rosé. In winter, washed‑rind and blue alongside aged cheddar and pear compote can handle a fortified wine or a hearty ale.
A “choose by season” rule
In warm months, prioritize freshness, fruit, and acid. In cold months, prioritize savory depth, nuts, and richer textures. Seasonal thinking keeps your board from feeling random, even when you’re shopping quickly.
Seasonal thinking keeps your board from feeling random.
Little Recipes to Elevate
If you want two tiny “host moves” that make a board feel curated, keep it simple. Quick‑pickled shallots take 10–20 minutes (thinly slice shallots, cover with white wine vinegar, add a pinch of sugar and salt). A citrus‑herb oil takes one minute (lemon zest, chopped herbs, olive oil) and makes goat cheese feel bright and intentional.
Two more tiny upgrades:
Toasted nuts (5–8 minutes until fragrant, then cool) add aroma and crunch. Warm honey drizzles more elegantly; a pinch of flaky salt makes the sweetness pop.
Presentation & Photography Tips
Keep the board natural and uncluttered. Use cloth napkins and small bowls; photograph with side light to show texture. If you add captions or share, a short note about the cheeses (milk type, age) helps readers learn.
Presentation without perfectionism
The best boards feel human. A little irregularity is charming.
Use one herb sprig, not a whole bouquet. Use two colors (green herbs and red grapes) rather than five. Keep packaging and labels off the board, but keep a small note card nearby if guests are curious.
Caring for Leftovers
Wrap cheeses in breathable paper and keep refrigerated. Use softer cheeses in cooked dishes (pasta, gratin) and aged cheeses grated over salads.
If you’re planning ahead, leftovers are a feature, not a problem:
Soft‑ripened cheeses melt into pasta sauces or spread onto toast. Semi‑hard cheeses are perfect for grilled cheese, omelets, or roasted vegetables. Blues can be crumbled into salad dressing or butter, where a little goes a long way.
Final Thought
Building a great plate is a practice: curate choices, taste often, and let the season guide what you pick. Start with contrast, keep it simple, and make every plate tell a small, delicious story.
If you remember one rule, make it this: choose for roles, not names. A creamy cheese, a savory anchor, a bold spark, plus acid and crunch. That formula creates boards that feel abundant, approachable, and quietly elegant every time.