Introduction
Bean-to-bar is chocolate with the curtain pulled back. You don’t just taste cacao and sugar—you taste the choices: how fermentation reads (fruit? funk? acidity?), what the roast does to nutty or floral notes, how cleanly you separated nibs from husk, and whether you refined long enough for texture to disappear.
The good news is you don’t need factory equipment to learn the craft. A micro-batch at home can teach you the logic of the process and the levers that actually move flavor, snap, gloss, and melt. The goal of this guide is simple: help you make your first deliberate bar, then give you a repeatable way to improve each batch. So grab your apron, warm up your curiosity, and let’s walk through the whole journey together—from raw cacao bean to a glossy, snappable bar you made with your own hands.
A Clear Map of the Bean-to-Bar Process
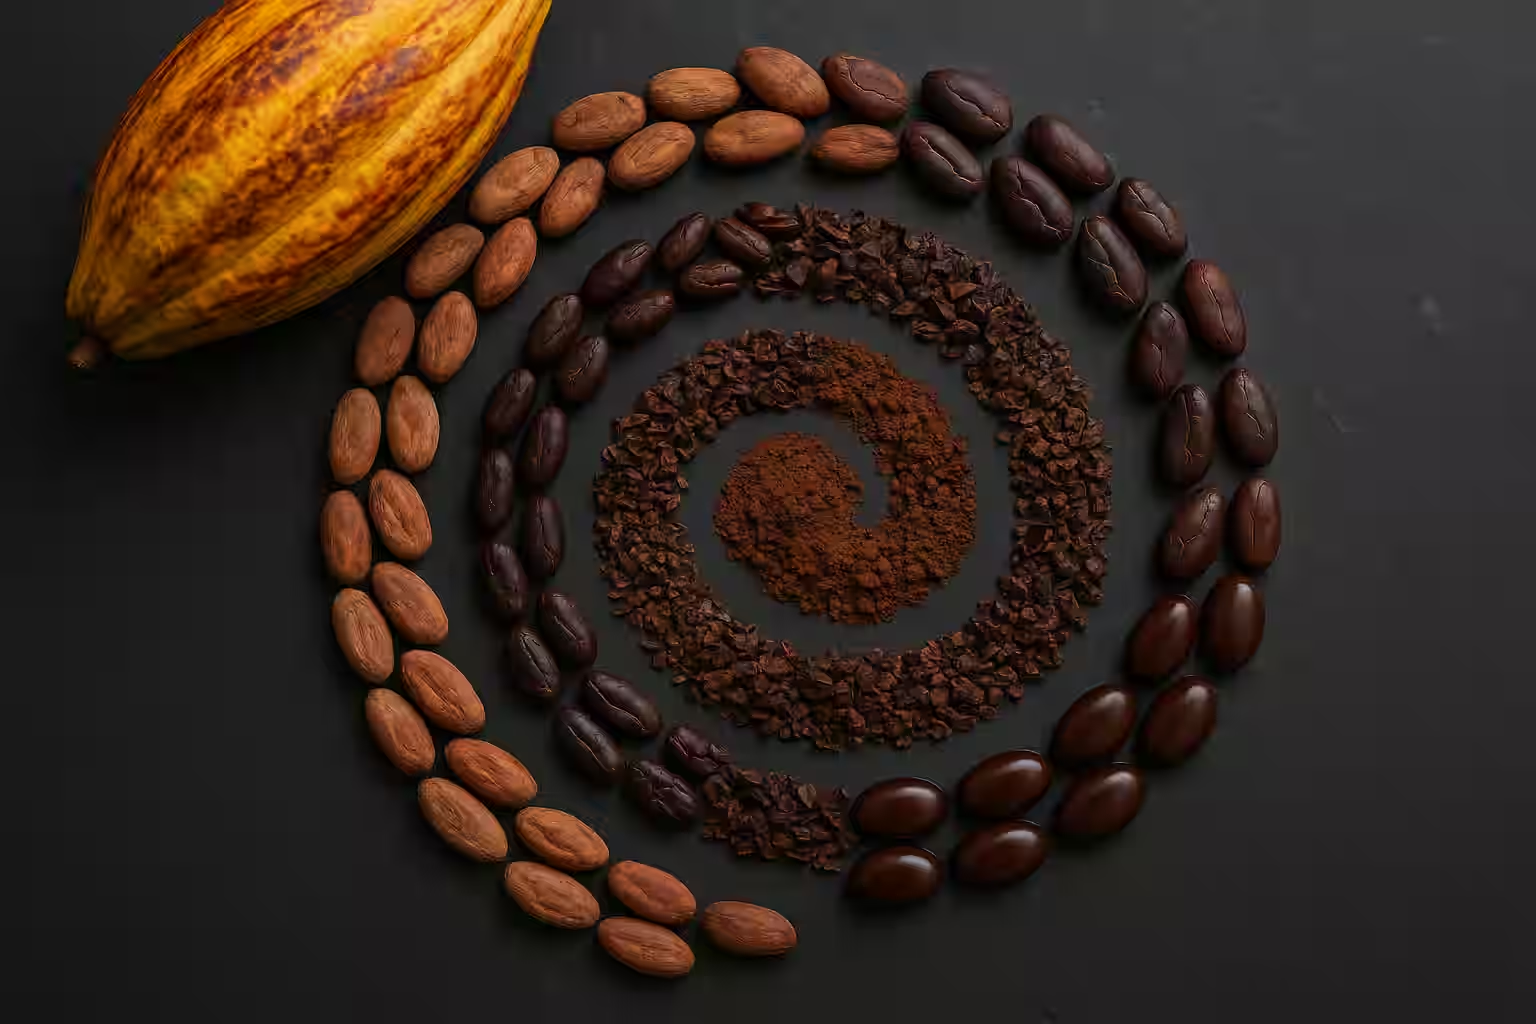
At a high level, bean-to-bar is a chain of transformations, and it helps to see the big picture before diving into the details. First, you sort and roast to develop aroma and tame the raw harshness hiding inside every fermented bean. Next comes cracking and winnowing, where you turn whole roasted beans into clean nibs by separating the papery husk from the good stuff inside. Then you move into the heart of the process—grinding, refining, and conching—which is where smooth chocolate is born and the flavor profile gets its final shape. Finally, you temper and mold, locking in that satisfying snap and mirror-like shine that makes a bar feel real.
If you ever get lost along the way, come back to that sequence. Each step has one main job, and most mistakes you’ll encounter are simply a step not doing its job fully. Once you internalize that idea, troubleshooting becomes a lot less mysterious.
What You’ll Learn (And What You Won’t)
You’ll learn how to choose beans you can trust, how to roast for flavor development without roasting away the unique origin character that makes single-origin chocolate so exciting, and how cracking and winnowing change the “clarity” of a finished bar in ways you might not expect. You’ll also learn what refining and conching are actually doing at a physical and chemical level, how to decide when you’ve done enough of each, and how to temper in a way that produces a bar you’re genuinely proud to unmold and share.
Here’s what you won’t find in this guide: a single “universal” roast profile that works for every origin. That mythical profile doesn’t exist, and anyone who tells you otherwise is oversimplifying. Instead, you’ll learn how to build a reasonable starting point, taste your way forward with intention, and keep notes so the next batch improves on purpose rather than by accident. Think of this less as a recipe and more as a framework for building your own chocolate intuition.
Equipment Tiers (Start Where You Are)
One of the biggest reasons home makers stall out is the assumption that there’s a single correct tool for each step. There isn’t. What matters is understanding what each step needs to accomplish, and then choosing tools that get you there at whatever budget and commitment level feels right. Think of it as three tiers.
Starter Tier (Learn the Process)
If you’re just dipping your toes in, you probably already own most of what you need. A basic oven or toaster oven handles roasting, and a baking sheet lined with parchment keeps things tidy. You’ll want a kitchen scale for measuring—eyeballing cacao is a recipe for inconsistency. For cracking, a rolling pin or even a zip-lock bag and a heavy book can do the trick in a pinch. A fine sieve or colander helps you sort nibs from shell fragments, and a hair dryer set to cool (or a small desk fan) gives you an improvised winnowing station. Finally, a decent blender lets you experience the “liquor” stage—grinding nibs into a rough paste to see what chocolate actually starts as before it gets refined.
This tier is fantastic for flavor learning. You’ll understand what each step does, and you’ll start developing your palate. Fair warning, though: you will usually hit a texture ceiling. The chocolate may taste interesting but feel gritty on the tongue. That’s normal, and it’s exactly what motivates the next upgrade.
Intermediate Tier (Get Repeatability)
This is where things get exciting. A convection roasting setup or a small drum roaster gives you much more control over heat distribution, which means more consistent flavor development. A simple DIY winnowing setup—like the classic bucket-and-fan method or the shop-vac approach many home makers swear by—makes separating husk from nib faster and cleaner. You’ll also want a reliable thermometer, and ideally an infrared thermometer for quick surface checks during roasting and tempering.
But the single most meaningful upgrade in this tier? A melanger—a stone grinder that does both refining and conching. This is the tool that moves you from “interesting experiment” to “I can make a real bar.” It takes gritty, rough chocolate liquor and, over hours of patient grinding, turns it into something genuinely smooth. If you’re going to invest in one piece of dedicated equipment, make it a melanger.
Serious Tier (Get Precision)
Once you’ve made a few dozen batches and you know what you’re chasing, the serious tier shifts your time from improvisation to refinement. A drum roaster with logging capability lets you record and replay roast curves, dialing in the exact temperature profile that brings out the best in a particular origin. A dedicated winnower takes the tedium out of separation and dramatically improves consistency. Pairing a melanger with a separate refiner gives you finer control over particle size and conching separately. And a tempering machine removes the manual guesswork from crystallization, letting you focus on flavor and formulation instead of wrestling with temperatures.
This tier is about production cadence and precision—making excellent chocolate repeatedly, not just occasionally.
Ingredient Basics (So Your Batch Behaves)
Most home dark chocolate is built from just three things, which is part of what makes this craft so elegant. Cacao nibs (or liquor made from them) provide the flavor foundation and structural backbone. Sugar brings sweetness and balance, rounding out the natural bitterness and acidity of cacao. And cocoa butter adjusts viscosity, melt characteristics, and molding behavior—think of it as the lubricant that makes everything play nicely together.
A common starting formula is 70% cacao / 30% sugar, which gives you a solidly dark bar with enough sweetness to be approachable. If you want a bar that molds more easily and feels “silky” at home scale, consider adding 2–8% cocoa butter on top of that, adjusting the cacao percentage down accordingly. A little extra cocoa butter can make tempering and molding significantly less stressful, especially if your refining setup tends to run warm or your molds are a bit finicky. Play with these ratios over a few batches and you’ll quickly discover your personal sweet spot.
Food Safety and Bean Quality (Unsexy, Non-Negotiable)
Cacao is an agricultural product. Treat it like one. This section isn’t glamorous, but skipping it is how you end up with off-flavors that no amount of clever roasting can fix.
Sort aggressively. Before anything else, go through your beans and discard any that are visibly moldy, smell musty, show signs of insect damage, or feel unusually light and flat (a sign they’re hollow or underdeveloped). Roasting is not a magic reset button—it helps reduce certain microbial loads and softens some off-notes, but it absolutely cannot turn low-quality beans into a great bar. Garbage in, garbage out, as the saying goes. And here’s one that catches a lot of beginners off guard: keep the entire process dry. Water is the enemy of both texture and temper. Even a small amount of moisture introduced at the wrong moment can cause thickening, seizing-like behavior, or blooming in your final bar.
A quick sniff test goes a long way. If your beans smell like a damp basement, compost them without hesitation. If they smell like vinegar and ripe fruit, don’t panic—that can be perfectly normal post-fermentation character that will mellow beautifully during roasting and conching.
Getting Started: The Five Core Steps
Step 1: Source and Sort Beans
Finding great beans is the foundation of great chocolate, and it’s worth being a little picky here. Look for single-origin cacao from sellers who provide transparent post-harvest notes, especially about fermentation and drying. If a seller can tell you the country and region but gets vague when you ask about fermentation days or drying methods, treat that as a yellow flag. Post-harvest handling has an enormous impact on flavor, and knowing what happened to your beans before they reached you helps you make better roasting decisions.
When you sit down to sort—and yes, you should actually sit down and do this by hand for small batches—you’re scanning for three categories of problems. First, defects: mold, insect damage, stones, twigs, or any other debris that clearly doesn’t belong. Second, size mismatch: very small beans roast significantly faster than large ones, so pulling out the outliers helps you achieve a more even roast. Third, off aromas: anything musty, chemical-smelling, or just plain “wet” should get tossed.
Sorting feels tedious, especially when you’re eager to start roasting. But here’s the thing: it’s one of the highest-leverage habits in small-batch chocolate making. When you’re working with just a few hundred grams, you don’t have the volume to average away defects the way a factory can. Every bean counts, and a single moldy one can drag down an entire batch.
Step 2: Roast for Flavor Development (Not for Darkness)
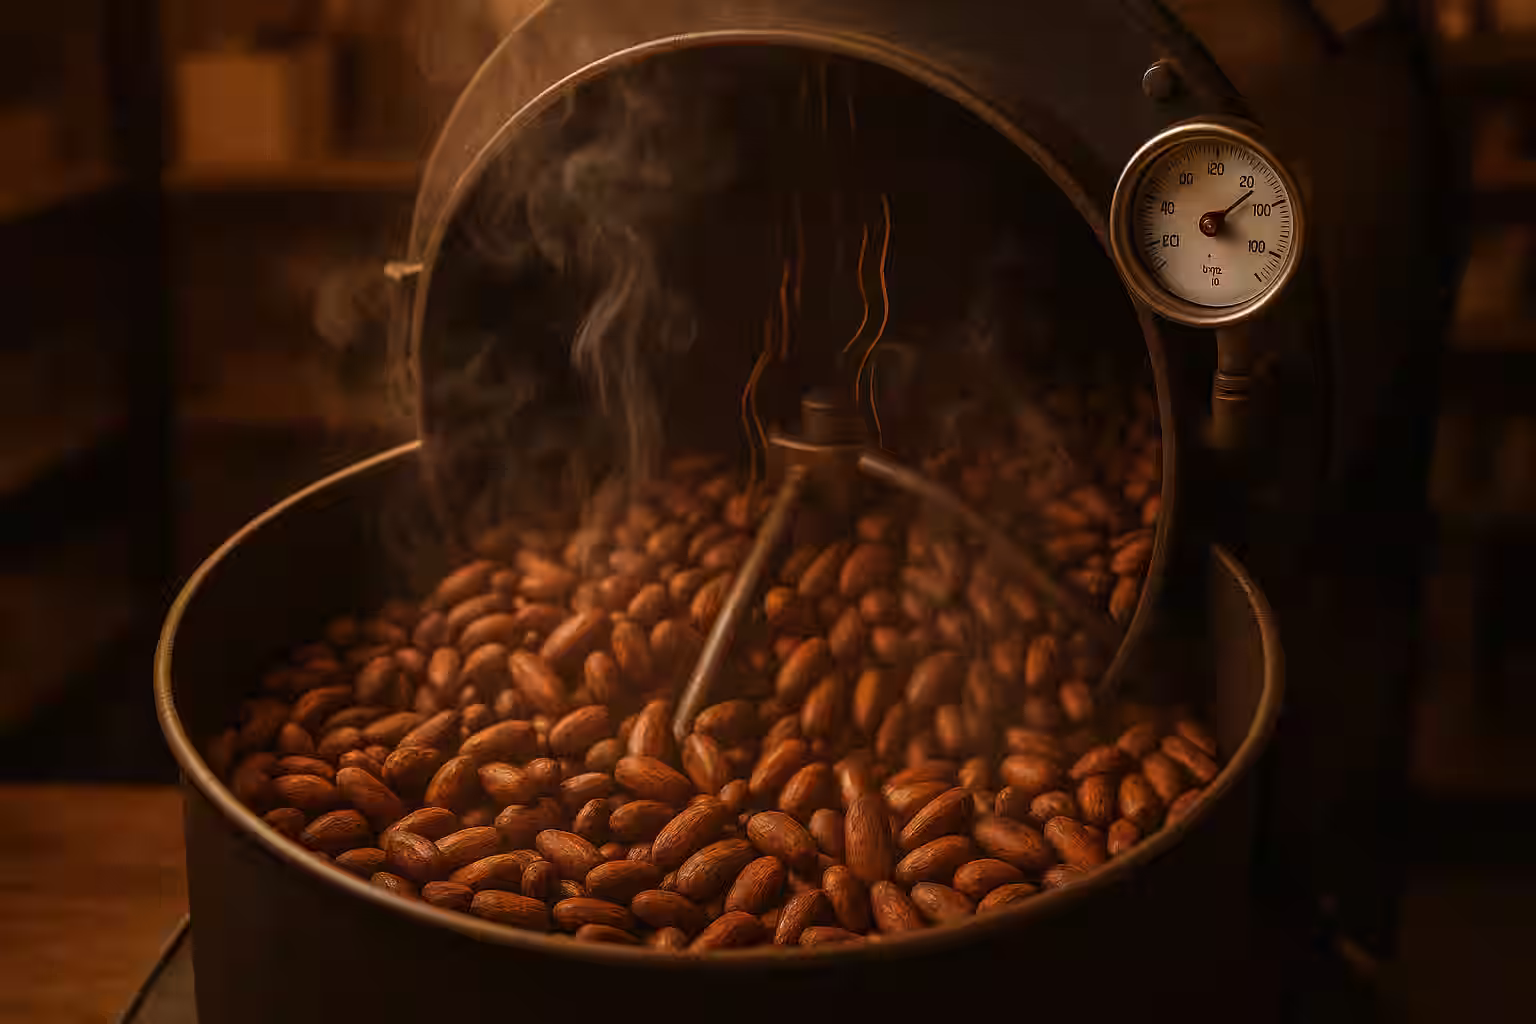
Think of roasting as having two distinct jobs. The first is to drive off harshness and those raw, astringent notes that make unroasted cacao taste more like chalk than chocolate. The second—and this is the art—is to develop aroma without tipping over into smoke or ash. You’re coaxing out caramel, nuts, dried fruit, and flowers. Push too far and you’ll bury all that nuance under a layer of char.
As a starting point, roast in a drum or convection roaster at 250–280°F (120–138°C) for 20–35 minutes, depending on bean size and moisture content. Keep things moving—agitate regularly for even heat distribution. And pay close attention to how the aroma in your kitchen changes over time. You’ll notice a progression: first a sharp, vinegar-like note gives way to a warm brownie smell, which then evolves into something nutty and toasty. That arc is your roadmap. Stop when the inside of the bean is cooked through and the initial sharpness has softened, but before the roast starts smelling smoky or acrid. It’s a narrower window than you’d think, so stay present.
Oven Roasting Tips (If That’s Your Setup)
If an oven is what you’ve got, you can absolutely make it work—you just need to be a bit more hands-on. Preheat fully and use an oven thermometer to verify your actual temperature, since many home ovens run hot or cold by 10–25 degrees. Spread your beans in a single layer on that parchment-lined baking sheet so heat reaches every bean evenly. Set a timer and stir every five minutes—this is non-negotiable with oven roasting because you don’t have the tumbling action of a drum. And when the roast is done, pull the beans out and let them rest uncovered on a cool surface. If you cover them or leave them in a pile, steam will re-wet the beans and undo some of the work you just did.
Step 3: Crack and Winnow (Clarity Comes From Clean Nibs)
Cracking breaks the roasted bean open so you can separate husk from nib. Winnowing is the actual separation step, and it’s more important than many beginners expect. Leftover husk adds bitterness, a dusty quality, and unpleasant “paper” notes to your finished chocolate. It can also make the texture feel dull and muddled, robbing your bar of the clarity that makes single-origin chocolate so exciting.
At home scale, grab a hand cracker or your trusty rolling pin to break the shells. Then winnow with a small shop vac or a hair dryer set to cool, letting the airflow carry away the lighter husk pieces while the heavier nibs fall into a collection bowl. Your target isn’t perfection—it’s consistency. You want to remove enough husk that it doesn’t muddy your flavor, without losing so many nib fragments that your yield suffers.
Quick Winnowing Reality Check
Here’s how to read the tea leaves (or, well, the cacao shells). If you see lots of papery bits mixed in with your nibs, your crack was probably too gentle. Larger shell pieces are actually easier to separate than fine dust, so you want a decisive crack that breaks the shell into big, airflow-friendly pieces. On the other hand, if you’re losing a lot of nib fragments to the waste pile, your airflow is too strong—dial it back. And if your finished chocolate tastes harsh and woody despite good beans and a careful roast, the most likely culprit is too much husk left behind. Go back and winnow more thoroughly next time.
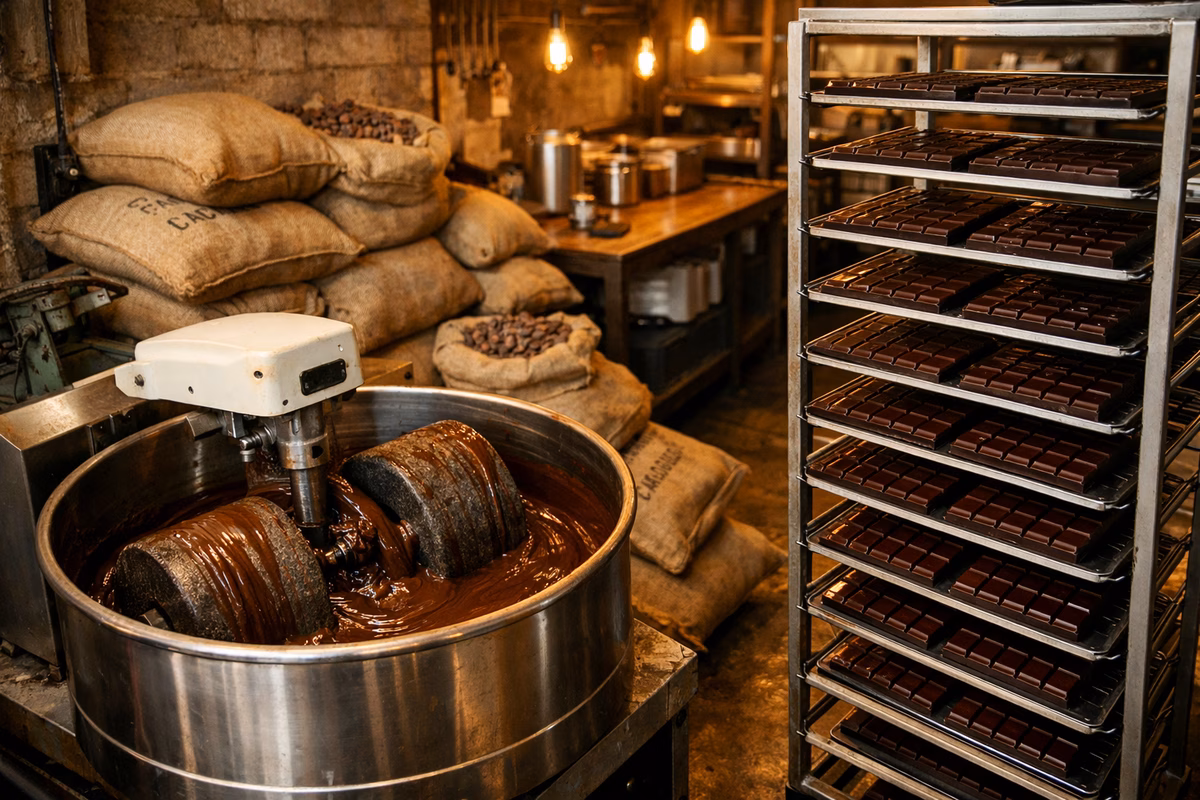
Step 4: Refine and Conch (Texture and Finish)
Refining and conching are often described as though they’re the same thing, and in a home melanger they do happen simultaneously. But it’s genuinely helpful to think of them as separate processes with different goals. Refining is texture work—you’re physically reducing particle size until the chocolate stops feeling gritty on your tongue. Conching is flavor and finish work—you’re driving off harsh volatiles, rounding rough edges, and integrating the sweetness so it doesn’t sit on top of the chocolate like frosting on a cake.
At home scale, a melanger handles both jobs beautifully. Start by warming your cocoa butter just enough that it’s fluid (not hot—you don’t want to scorch anything), then add your nibs or pre-ground liquor and let the stone wheels begin breaking everything down. Add your sugar gradually—this is important, because dumping it all in at once can turn your batch into a dry, crumbly paste that the grinder struggles to move. Let the machine run for 12–24 hours until the grit falls below roughly 20 microns (you can check by smearing a tiny bit between your fingers—if you can feel individual particles, keep going) and the sharp, astringent edges have mellowed.
Taste periodically throughout the process. Seriously, this is one of the genuine pleasures of home chocolate making—watching flavor evolve in real time. The goal isn’t “as long as possible.” It’s coherence: smooth texture, integrated sweetness, and a finish that feels clean rather than muddled or cloying.
Formulation Tips That Save Batches
A few scenarios you’re likely to encounter: if your batch becomes too thick to flow properly, the fix is usually more cocoa butter. Add a small amount—maybe a tablespoon at a time—and give it time to fully incorporate before adding more. Sometimes the issue is that your grinder is running cool, which thickens the mass. If the chocolate tastes thin or overly sweet, resist the urge to add more sugar (yes, this happens). Instead, reduce cocoa butter in your next batch and bump up the cacao percentage. And if the chocolate feels waxy on the palate, you’ve probably pushed cocoa butter too high for your preference. Scale it back next time and find the balance point that feels right to you.
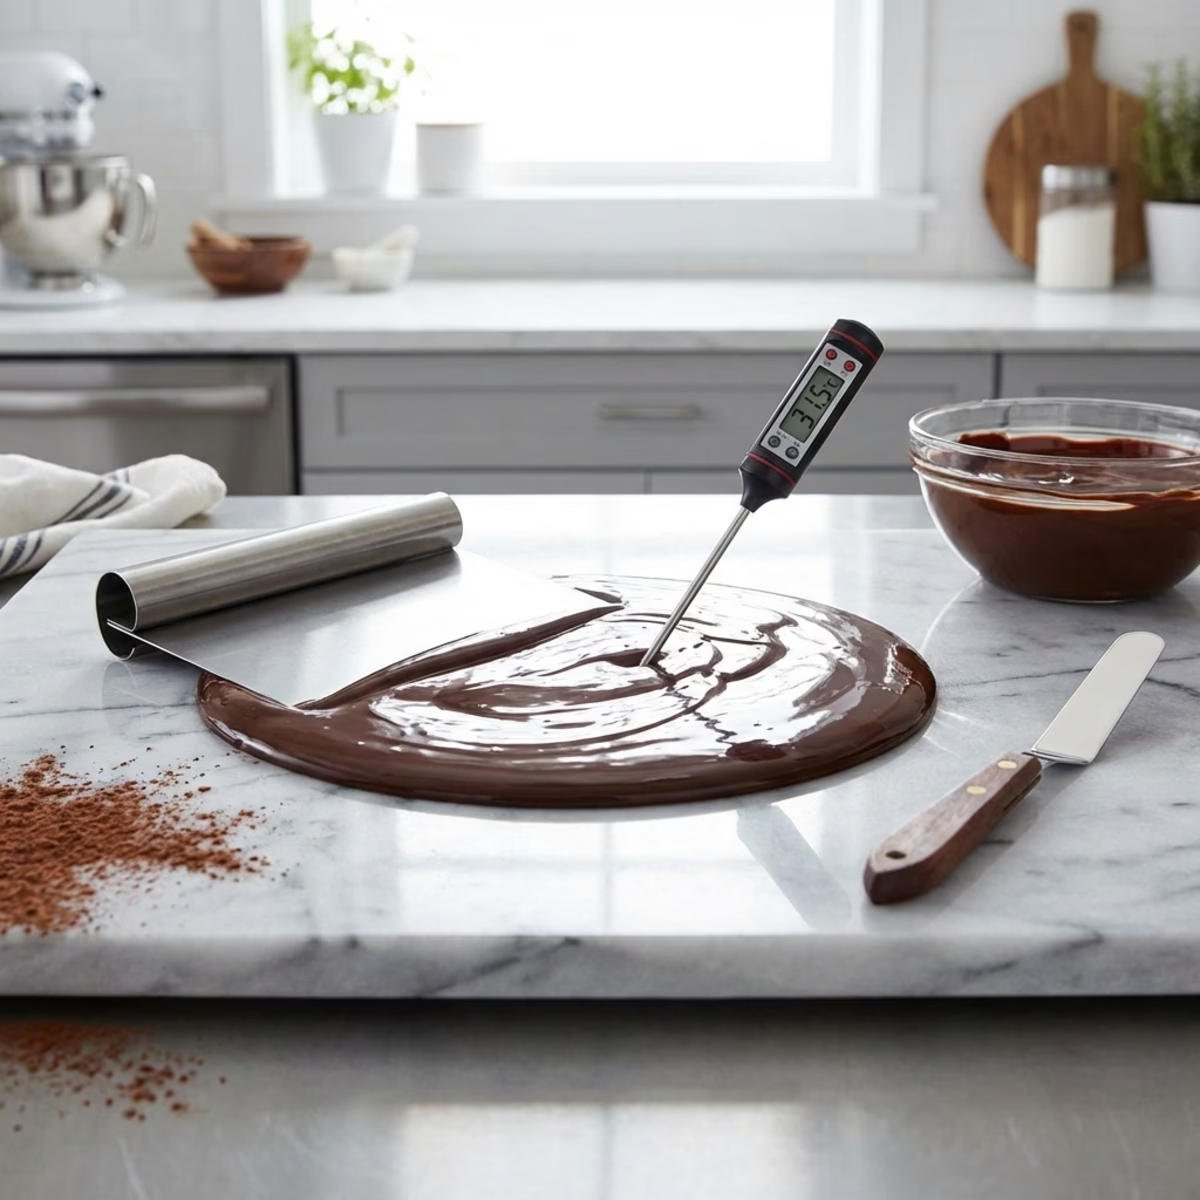
Step 5: Temper and Mold (Snap, Shine, and Stability)
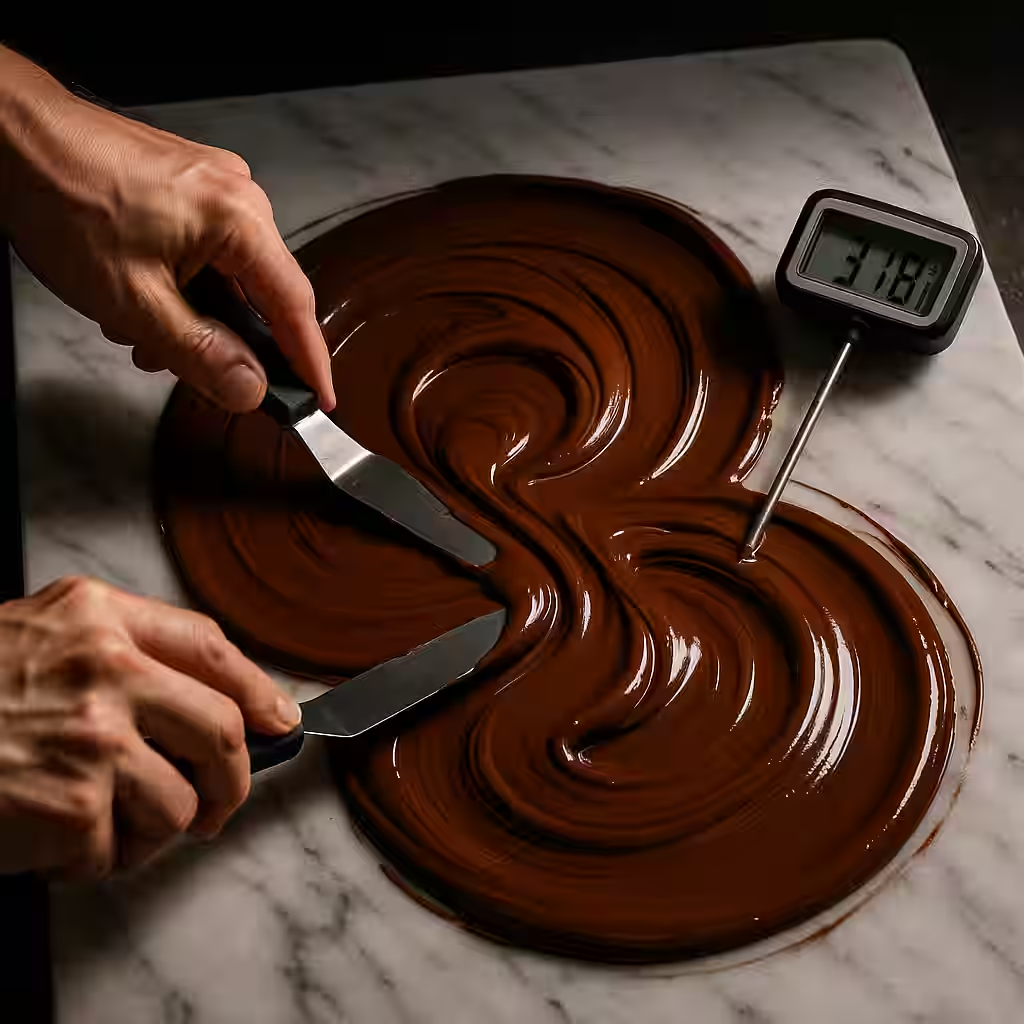
Tempering is controlled crystallization, and honestly, it’s the step that intimidates people the most. But here’s what’s actually happening: cocoa butter can solidify into several different crystal forms, and only one of them—called Form V, or beta crystals—gives you that gorgeous gloss, satisfying snap, and resistance to bloom that makes a bar feel professional. Your job during tempering is to guide the cocoa butter into that stable crystal structure.
For dark chocolate, a useful working target is 88–90°F (31–32°C), which is the temperature range where those stable beta crystals are happy. Mold promptly once you hit your target, and tap the filled molds firmly against the counter a few times to release any trapped air bubbles.
If you’re new to tempering, keep your process as simple as possible. Keep water away from the chocolate—even a single drop can cause seizing. Stir more than you think you need to—constant movement encourages even crystal formation and prevents hot spots. And don’t guess on temperature: use a thermometer. Your fingers are not thermometers, no matter how experienced they are. A few degrees make the difference between a bar that releases beautifully and one that sticks stubbornly to the mold.
A Typical Micro-Batch Timeline (Weekend Rhythm)
Here’s the beautiful thing about home-scale bean-to-bar: a micro-batch fits perfectly into a relaxed weekend rhythm. On Day 1 in the morning, you sort and roast your beans, then let them rest so residual moisture can escape. That afternoon, you crack and winnow, storing your clean nibs in a sealed container so they stay fresh. Come evening, you load up the melanger, start it running, and add sugar gradually over the first hour or so. The melanger runs overnight, refining and conching while you sleep—which is honestly one of the most satisfying feelings in this whole hobby, knowing that chocolate is being made while you dream.
On Day 2, you temper, mold, and clean up. Let the bars set fully at a cool, stable room temperature (not the fridge, unless you’re very careful about condensation). Then evaluate your results on day two or day three if you can stand the wait. Snap, shine, and mouthfeel will tell you everything you need to know about what to adjust next time—your roast curve, your winnowing efficiency, your conch time, or your cocoa butter percentage.
Tips & Tricks
Beyond logging your roasts, there are a few additional high-payoff habits worth building early. Taste your nibs before you start grinding. If they taste dull, flat, or acrid at the nib stage, no amount of refining or conching is going to fix that—the problem is upstream, either in your beans or your roast. Keep a simple batch sheet for every batch you make. It doesn’t need to be elaborate: origin, roast parameters, formulation ratios, melanger time, and tempering method are more than enough. You’d be amazed how quickly you forget the details of a batch from three weeks ago, and those notes are gold when you’re trying to reproduce a winner. And finally, change one variable at a time. This is the hardest discipline in the hobby because it’s so tempting to tweak everything at once. But if you change your roast profile, your formulation, and your tempering method all in the same batch, you won’t have any idea which change actually helped (or hurt). Be patient, be methodical, and let each batch teach you one clear lesson.
Troubleshooting: The Problems You’ll Actually See
“My chocolate is gritty.”
Grittiness is the most common complaint from home makers, and it usually has a straightforward cause: particles are still too large. The fix is more time in the melanger—refine and conch longer, giving the stone wheels more time to break everything down below that 20-micron threshold where your tongue stops detecting individual particles. It also helps to add sugar gradually rather than all at once, so the grinder can incorporate and break it down evenly. And double-check that you haven’t accidentally introduced any moisture during the process, because even a small amount of water can cause thickening and stubborn texture problems that mimic grittiness.
“My chocolate is too thick to mold.”
When your chocolate comes out of the melanger too viscous to pour into molds, the usual suspects are low cocoa butter content, too much sugar relative to fat, or a grinder that’s running cool and not keeping the mass fluid enough. The quickest fix is to add a small amount of cocoa butter and let it fully incorporate—don’t dump in a big slug all at once. You can also warm the batch gently (emphasis on gently, not hot) and stir to loosen things up. For next time, consider a slightly lower cacao percentage or a touch more cocoa butter in your starting formula.
“It tastes sour, sharp, or vinegary.”
That character typically comes from fermentation acids that haven’t been fully driven off. For your next batch, try roasting slightly longer or at a slightly higher temperature to help volatile acids escape. You can also conch longer in the current batch, since some sharpness will mellow with extended conching time. But if the acidity is truly extreme and persistent, the issue may be at the bean source—over-fermented or improperly dried beans carry an acid load that processing can only partially reduce.
“It tastes smoky or ashy.”
This is almost always roast overdevelopment, and unfortunately it’s one of the hardest flavors to fix after the fact. For your next batch, lower the roast temperature or shorten the roast time—sometimes just a few minutes less makes a dramatic difference. Also check your roasting setup for hot spots: if one corner of your oven runs hotter, or your drum has a dead zone where beans pile up and scorch, that uneven heat can create smoky notes even at otherwise reasonable temperatures.
“My bars bloom or streak.”
That white haze or those ghostly streaks on the surface of your bar? That’s bloom, and most of the time it’s related to tempering or cooling conditions. First, make sure you truly hit and held a stable working temperature during tempering—being even a couple of degrees off can prevent proper crystal formation. Avoid molding in very warm rooms, since ambient heat can slow setting and encourage unstable crystal forms. And when cooling your molds, aim for steady, moderate conditions. Rapid fridge cooling sounds like a good idea, but the temperature swings can cause condensation on the chocolate surface, leading to sugar bloom. Patience pays off here.
Conclusion
Home-scale bean-to-bar production rewards patience, cleanliness, and note-taking above all else. Once you can make a bar that sets cleanly and tastes intentional—not accidental—you’ve built a foundation you can iterate on essentially forever. Roast curves, winnowing efficiency, conching time, formulation tweaks: each variable is a knob you can turn, and the more batches you make, the better your ears get at hearing what each adjustment does. Welcome to the rabbit hole. It’s delicious down here.
Frequently Asked Questions
How long can nibs store before refining?
Up to 6 months in an airtight, odor-free container at 60–70°F (15–21°C). Keep them away from strong odors; nibs are porous and will pick up smells.
What if my temper streaks?
Re-melt to 115°F (46°C), cool to 82°F (28°C), and reheat to working temperature while stirring gently.
Why is my chocolate gritty?
Grittiness usually means sugar (or cocoa solids) are still too large. Conch/refine longer, add sugar gradually, and confirm the batch stayed dry.
Can I make bean-to-bar without a melanger?
You can learn the process without one, but texture will usually remain coarse. If smooth mouthfeel is the goal, a melanger (or equivalent refining approach) is the most direct path.