Charcoal intimidates people because it feels less like an appliance and more like a living thing, and in a sense it is. You do not set charcoal to a number. You feed it oxygen, give it fuel, and steer it with patience, and once you understand that it is a fire you manage rather than a dial you turn, the whole thing becomes approachable and even relaxing. The reward for learning it is real control and a flavor that gas struggles to match. This guide covers the fundamentals: choosing fuel, lighting cleanly, reading vents, handling ash, and building the heat zones that make charcoal so versatile.
Briquettes and lump, and why neither wins
The first debate every charcoal cook wanders into is briquettes versus lump, and the honest answer is that they are tools for different jobs rather than rivals. Briquettes are manufactured to a uniform size and density, which makes them burn predictably and steadily, and that consistency is exactly what you want for a long, controlled cook where the temperature needs to hold for hours. Lump charcoal is simply carbonized wood, so the pieces come in all shapes and sizes; it tends to light quickly, can burn hotter, and gives a more responsive, lively fire, at the cost of that irregularity meaning some pieces catch fast while others lag.
Neither is morally superior, whatever the internet insists. Reach for briquettes when repeatability matters, as it does with ribs or anything that runs long. Reach for lump when you want a hot, reactive fire and do not mind sorting the odd oversized chunk. The genuinely useful move is to try both before you build an identity around a single bag, because your own cooking style will tell you which you prefer far better than any argument will.
Lighting cleanly with a chimney
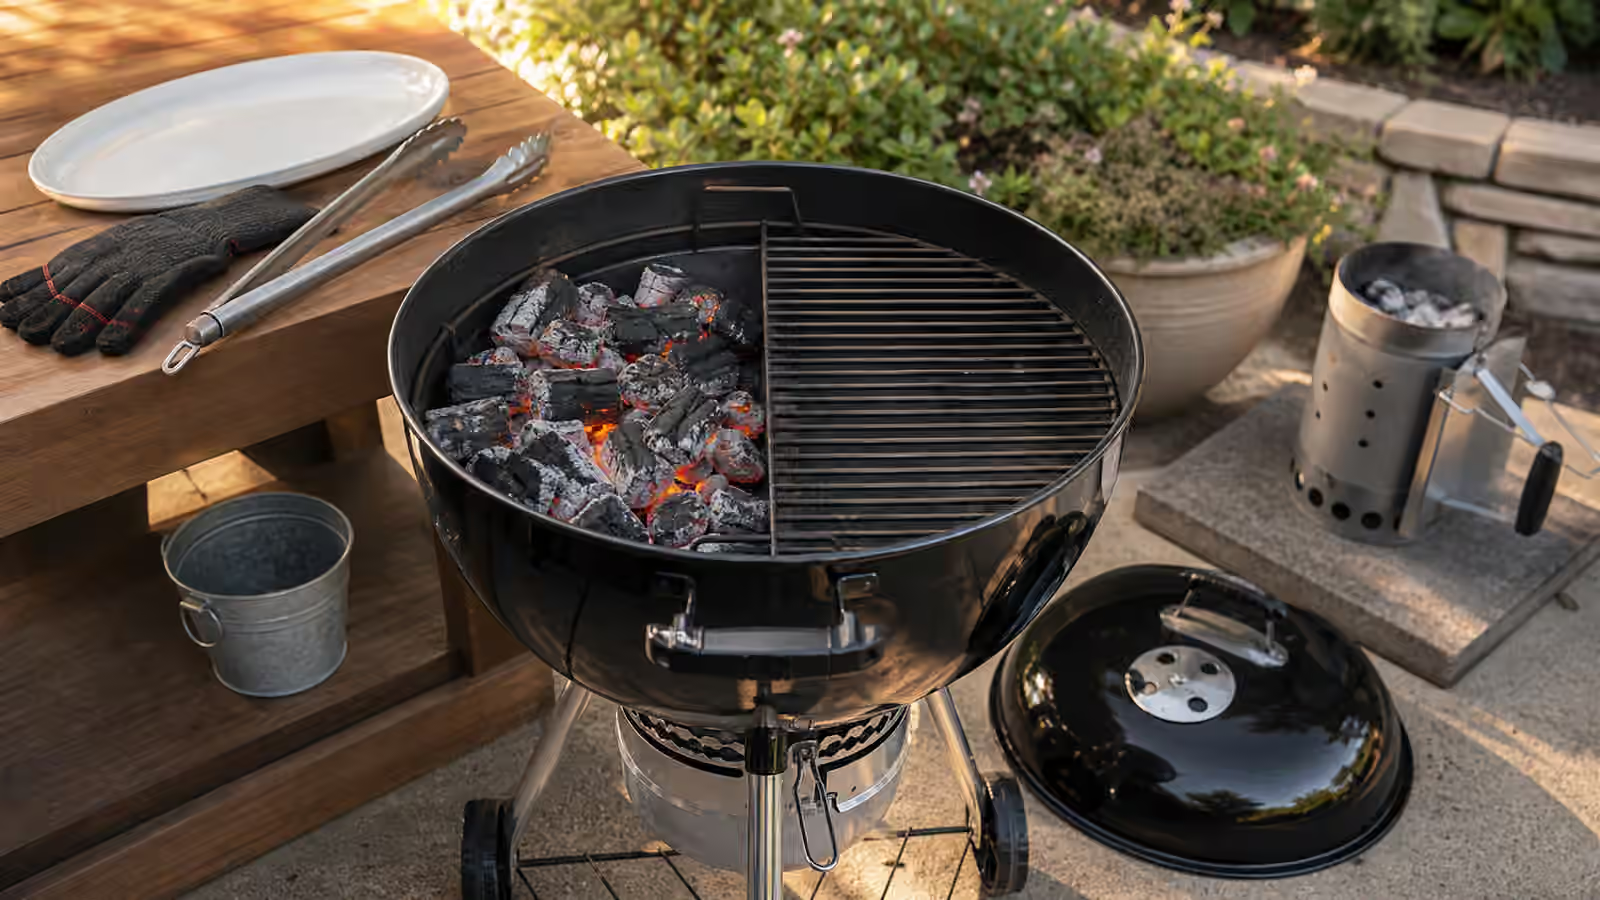
The best thing you can do for the flavor of charcoal food is to stop using lighter fluid, and a chimney starter makes that easy. Fill the chimney with charcoal, set it over a couple of lit fire starters or crumpled paper, and let the draft do the work as the flame climbs up through the coals. When the top layer shows gray, ashy edges, the batch is lit and ready to pour. Wear heat gloves, keep the chimney on a fire-safe surface the whole time, and never tip lit coals out anywhere you have not already planned to put them. That last point is worth repeating: know where the coals are going before you lift the chimney.
Where you pour determines what kind of cooking you can do. Bank the lit coals to one side of the grill and you have created two zones at once, a hot direct side for searing and a cooler indirect side for gentler cooking and for moving food out of trouble. For low-and-slow smoking, you want the opposite of a roaring fire: start with only a few lit coals nestled against a bed of unlit fuel, and let the fire spread slowly through the pile so it burns for hours at a low, steady temperature rather than blazing and dying quickly.
Vents are your throttle
Charcoal has no temperature knob, but it does have vents, and the vents are how you actually drive the fire. The bottom intake vent feeds oxygen to the coals, and the top exhaust vent draws heat and smoke up and across the food before it leaves. As a rule, opening vents lets in more air and pushes the fire hotter, while closing them starves it and cools it down. The mistake nearly every beginner makes is treating the vents like a video game controller, adjusting constantly and expecting instant results. A charcoal grill is a mass of metal, fuel, and moving air, and it responds slowly. Make one change, then wait several minutes to see where the temperature settles before you touch anything again. Patience with the vents is most of the skill.
Ash, cleanup, and shutting down safely
Ash is easy to ignore and quietly ruins fires. It builds up under the coals, chokes off the airflow the fire needs to breathe, and holds heat far longer than its dull gray appearance suggests. Clear the old ash out before every cook so fresh coals can draw air freely, and expect a fire that struggles to hold temperature if the ash pan is packed. When the cook is over, close the vents to suffocate the remaining coals and let everything cool completely, which can take longer than you think. Dispose of ash only in a dedicated metal container, following your local guidance, and never tip warm ash into plastic, dry leaves, cardboard, or anything else that can catch, because coals can stay hot enough to start a fire long after they look dead.
Underneath the fire craft, keep the food-safety habits constant. Use thermometer-based doneness for meat, poultry, seafood, leftovers, and reheating rather than judging by the char. Keep raw and cooked foods separate, wash hands and tools after raw contact, and move perishables toward chilling instead of leaving them in the outdoor danger zone while the coals do their slow work. For current official reference, keep FoodSafety.gov’s safe minimum internal temperatures and clean, separate, cook, chill guidance close by, and USDA FSIS keeps a grilling food safely resource that is especially relevant to charcoal cooking, smoking, and holding.
To keep building, Fire, Airflow, and Fuel goes deeper on the combustion side, Two-Zone Grilling turns the banked-coal idea into a whole way of cooking, and Wood for Smoke: Hickory, Oak, Apple, Cherry, Mesquite, and More shows how to add flavor once the fire is under control. For a change of craft that shares the same heat-and-timing mindset, Salt Works plays with smoke and seasoning, and Coffee Mastery is another discipline built entirely around managing heat over time.