Keyboard Maintenance & Care
Mechanical keyboards are durable by design, but “durable” doesn’t mean “maintenance‑free.” Dust, skin oils, crumbs, humidity, cable stress, and accidental spills all accumulate slowly—until one day the board feels gritty, rattly, or unreliable.
This guide is about keeping a keyboard feeling new for years: gentle daily habits, a realistic cleaning rhythm, and clear troubleshooting steps when something goes wrong.
Daily Care & Best Practices
Daily care is less about perfection and more about reducing the two biggest risks: contamination (dust + oils + food) and liquid.
Using Your Keyboard
The best “maintenance” is how you treat the board while you use it.
Do:
- Type with reasonably clean hands
- Keep drinks at a safe distance (or use a lid)
- Pick up the keyboard by the case, not the cable
- Unplug during electrical storms if you’re in a high‑surge area
Don’t:
- Eat directly over the keyboard (crumbs migrate into switches)
- Slam keys harder than necessary (it adds noise and wear without benefit)
- Move the keyboard by pulling the cable (connector stress is real)
Preventing Dust & Debris
Dust isn’t just cosmetic. Dust + skin oils can make switches feel scratchy and stabilizers sound rattly.
Simple prevention:
- Cover the keyboard when you’re not using it (a dust cover is nice; a clean cloth works).
- Keep your desk surface clean so debris doesn’t get pushed into the key gaps.
- If you live in a dusty area, a small air purifier can reduce how often you need deep cleans.
Cleaning Schedule
The goal is a schedule you’ll actually follow. Think in layers: quick wins often, deeper work rarely.
Daily (30 seconds)
- Wipe the keycap tops with a microfiber cloth.
- Remove visible crumbs before they get pressed deeper.
Weekly (2 minutes)
- Turn the keyboard upside down and gently shake over a trash can.
- Use short bursts of compressed air between key rows.
- Wipe the case with a slightly damp cloth.
Monthly (10–15 minutes)
- Remove keycaps (or at least the dirtiest zones: spacebar area, WASD, arrow cluster).
- Brush dust off the plate and around switches.
- Clean keycaps in warm soapy water (if you have time).
Yearly (1–2 hours)
- Full deep clean.
- Inspect stabilizers and re‑lube if they rattle or stick.
- Address small issues early (a single failing switch is easier than chasing intermittent problems).
Deep Cleaning Guide
Deep cleaning sounds intimidating, but it’s mostly careful disassembly and patience. The big rule: keep moisture away from the PCB unless you’re doing a deliberate spill recovery procedure.
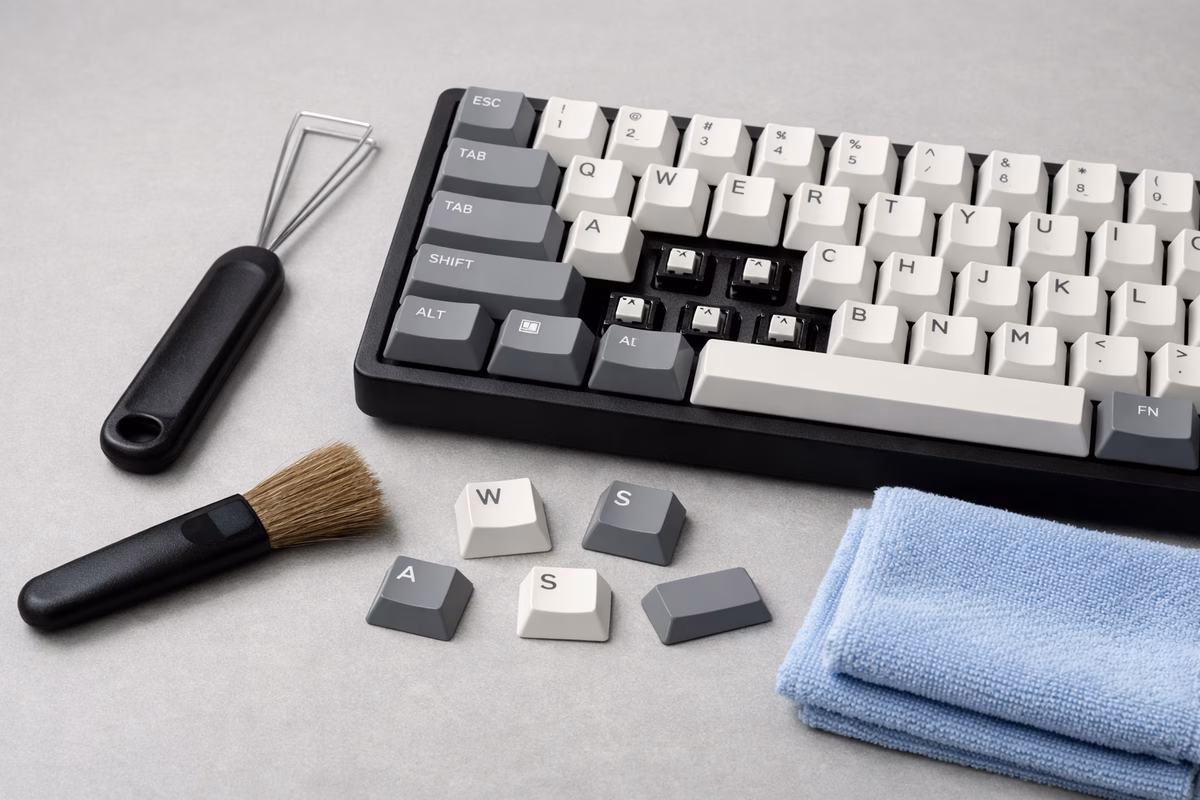
Tools Needed
Essential:
- Keycap puller (wire pullers are gentle)
- Compressed air (can or electric duster)
- Microfiber cloths
- Warm soapy water
- Soft brush (a toothbrush works)
Optional (use with care):
- Isopropyl alcohol 70%+ for sticky grime on plastic case surfaces and metal plates (avoid printed legends)
- Cotton swabs for tight crevices
- Denture cleaning tablets for keycap soaking
Step-by-Step Deep Clean
Step 1: Photo documentation
Take a photo of the layout. This is especially helpful for non‑standard layouts, split boards, and unusual bottom rows.
Step 2: Power down
Unplug the keyboard. For wireless boards, turn the power switch off and remove batteries if it’s easy.
Step 3: Remove keycaps
Pull straight up. Don’t twist aggressively—twisting can stress stems or loosen stabilizer inserts.
If you want a tidy reassembly, pull caps in rows and keep them roughly grouped.
Step 4: Clean the keyboard body
- Shake debris out.
- Blow out dust with compressed air (short bursts).
- Brush the plate gently.
- Wipe the case with a slightly damp microfiber cloth.
- Use cotton swabs around stabilizers and tight corners.
Caution: keep compressed air cans upright to avoid spraying cold liquid.
Step 5: Clean keycaps
Most keycaps handle warm soapy water well. Avoid hot water—heat can warp plastic.
- Soak keycaps 15–30 minutes.
- Agitate occasionally.
- Brush the grimiest caps.
- Rinse thoroughly.
- Dry on a towel for 24 hours.
If your keycaps have delicate printed legends, avoid alcohol and harsh scrubbers.
Step 6: Dry everything completely
Keycaps should be truly dry before reinstalling. Moisture trapped in stems is a sneaky way to create problems.
Step 7: Reassemble and test
Start with the spacebar to confirm stabilizers feel right, then install large modifiers, then alphas.
Test every key with a simple keyboard tester.
Spill Recovery (Act Fast!)
Spills are survivable—sometimes. The outcome depends on liquid type, how fast you disconnect power, and how thoroughly you remove residue.
Immediate Actions (First 60 Seconds)
Disconnect immediately. Unplug USB or remove batteries. Don’t “finish the paragraph.”
Flip and drain. Turn the keyboard upside down so liquid runs out instead of deeper in.
Remove keycaps if possible. More airflow and better access.
Blot—don’t wipe—around switches. Wiping can push liquid further in.
Recovery Process (Next 24–72 Hours)
Water spills:
- Keep the board upside down 24–48 hours.
- Use a fan for airflow.
- Wait before powering on.
Sugary or sticky spills (soda, juice, sweet coffee):
Sugar residue causes corrosion and sticky switches. The board often needs disassembly and cleaning, not just drying.
- Disassemble the case.
- Remove residue carefully.
- Use high‑percentage isopropyl alcohol to help displace water on appropriate surfaces.
- Dry thoroughly for 48–72 hours.
If you hear crackling, smell burning, or see visible corrosion, stop and treat it as a repair project.
Switch Maintenance
Switch maintenance is the art of deciding what’s worth touching. You can keep a board happy for years without opening a single switch—unless you enjoy modding.
When to Lube Switches
Lubing is optional. Do it when it solves a real problem.
Lube if:
- Switches feel scratchy
- Smoothness varies a lot between keys
- Springs ping audibly
- You want a quieter, more refined feel
Don’t lube if:
- Switches already feel good to you
- You don’t want the time investment (3–6 hours is normal)
- It’s your very first board and you’re still learning what “stock” feels like
How to Lube Switches (Overview)
The details depend on switch design, but the pattern is consistent: open, apply a thin coat in the right friction areas, reassemble.
Tools:
- Appropriate switch lubricant
- Switch opener
- Small brush
- Patience
If you want the full deep dive on internals and technique, the building guide is the right place to go.
When to Replace Switches
Switches are wear items. Replacing a failing switch is often faster than trying to “repair” it.
Replace switches if you see:
- Chattering (double‑typing)
- Intermittent registration that cleaning doesn’t fix
- Physical damage (broken stem)
- A clear desire for a different feel/sound
Hot‑swap boards make this easy. Soldered boards can still be repaired, but the labor cost is higher.
Stabilizer Maintenance
Stabilizers (spacebar, enter, shift, backspace) are where most “quality” sound comes from. A board can have great switches and still feel cheap if the stabilizers rattle or stick.
Signs Stabilizers Need Attention
- Rattle or tick on large keys
- Sticky return (key comes up slowly)
- Uneven feel left vs right
Stabilizer Service (high level)
At a minimum:
- Remove the keycap.
- Clean visible grime.
- Re‑lube stabilizer contact points if needed.
If the stabilizer is truly bad, removing it for a full clean and re‑lube will usually restore it.
USB Cable Care
Most “random disconnect” issues are cable issues, not electronics failures.
Extending Cable Life
Do:
- Coil loosely when storing
- Unplug by the connector, not the cable
- Use a cable clip/holder to prevent yanks
Don’t:
- Crimp sharply at the connector
- Roll a chair over the cable
- Let the connector hang under tension
Fixing Connection Issues
If the keyboard disconnects intermittently:
- Try a different USB port.
- Try a different cable (if detachable).
- Inspect the connector for bent pins or debris.
- Reseat firmly.
If it still fails, replacing a cable is cheap compared to replacing a board.
Wireless Keyboard Care
Wireless keyboards add battery management and connection stability to your maintenance list.
Battery Maintenance
Rechargeables prefer gentle cycles. Avoid deep discharge when possible, and don’t store a battery completely empty.
If you store the keyboard for months, remove disposable batteries to prevent leaks.
Bluetooth Connection Issues
Most Bluetooth issues are solved by re‑pairing, updating firmware (when appropriate), and reducing interference.
If connection becomes unreliable, check battery level first. Low battery can create strange behavior.
Firmware & Software
Firmware updates can fix bugs, but they can also introduce new ones. Treat updates like small change management.
When to Update Firmware
Update when you need a fix or feature. Don’t update five minutes before an important deadline.
QMK/VIA Keyboards
If you use VIA/QMK tools, export and save your keymap so you can restore it quickly.
Storage (Long-Term)
If a keyboard will sit for months:
- Deep clean first so oils don’t harden.
- Remove batteries.
- Store in a cool, dry place.
- Add silica gel if you live in a humid climate.
When you bring it back, test every key before you rely on it.
Common Problems & Fixes
Problem: Key Chattering (Double‑Typing)
Chatter is often a dirty contact or a failing switch.
Try cleaning (compressed air), then increase debounce delay in firmware if your board supports it. If it persists, replace the switch.
Problem: Key Not Registering
On hot‑swap boards, this is commonly a bent switch pin or a bad socket connection.
If shorting the socket registers input but the switch doesn’t, it’s the switch. If neither registers, it’s likely socket/PCB and becomes an advanced repair.
Problem: Stabilizer Rattle
Rattle is usually a lubrication or fit issue. Re‑lube and ensure the stabilizer is seated properly.
Problem: Sticky Keys
Sticky keys are usually spill residue or too much lubricant. Clean first; if needed, disassemble and de‑lube or replace the switch.
Problem: Mushy Feel
Mechanical boards can feel mushy if over‑lubed or if the plate/case assembly is loose. Recheck assembly and consider whether the feel is actually coming from keycaps (thin ABS can change perception).
Extending Keyboard Lifespan
The “secret” to a 10–20‑year keyboard is boring consistency:
- Keep it clean.
- Keep liquids away.
- Fix small issues early.
- Reduce cable stress.
Mechanical keyboards reward care because most parts are modular: keycaps, switches, stabilizers, cables, and even plates can be replaced.
When to Replace vs. Repair
Repair is usually worth it when the issue is isolated (one switch, a rattly stabilizer, a dead cable). Replacement is usually rational when the PCB is corroded or multiple traces are dead.
If a board is sentimental or rare, repair makes sense even when it’s not economical.
Final Maintenance Wisdom
Your keyboard is a tool you touch thousands of times a day. Treat it like a good chef treats a knife: keep it clean, store it well, and fix problems before they become failures. The payoff is reliability—and that satisfying “this feels right” moment every time you sit down to type.
Next Steps
- Building Guide - Learn keyboard internals
- Switch Guide - Understand switch maintenance needs
- Keycaps Guide - Keep keycaps looking new