
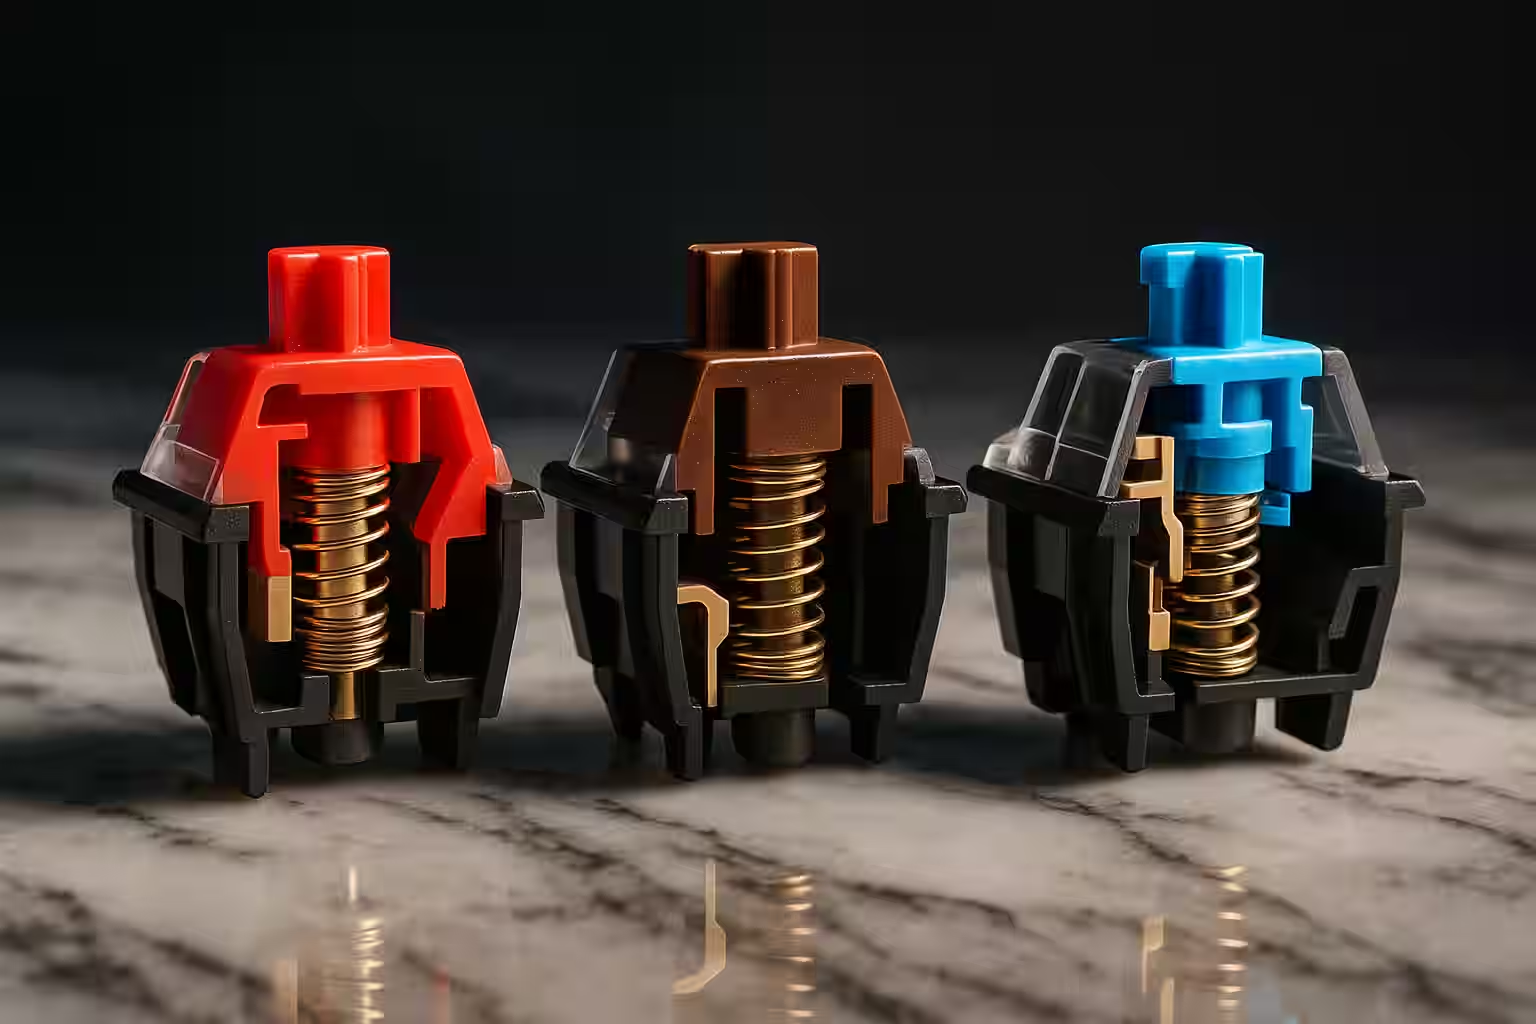
Mechanical Keyboards: 30-Minute Quickstart
If your current keyboard feels mushy, this guide will help you pick a better one without getting lost in switch reviews.
Mechanical keyboards can be a hobby, but they do not have to be. Your first board can just be a better tool that fits how you work.
Minute 1–5: What makes a mechanical keyboard different
A mechanical keyboard has one switch under each key. That changes the feel, the actuation, and the parts you can replace.
People usually switch for the feel first. A mechanical board can be smooth, bumpy, crisp, quiet, or intentionally loud, and the keys tend to feel more consistent than rubber domes. The better boards are also easier to repair or tune: on a hot-swap board, a bad switch can be replaced, keycaps can be changed, and the layout or sound can be adjusted without buying a whole new keyboard.
Switch type matters more than brand. If the feel is right, a modest board can still be a good board.
Minute 6–10: Layout sizes
Smaller is not better. It is a trade.
Full-size boards keep the numpad and are still the right answer for spreadsheets, data entry, and anyone who uses number entry all day. TKL boards remove the numpad and free mouse space without making the keyboard feel strange. A 75% board keeps the function row and arrows in a tighter footprint, which is why it is such a practical first compact layout. A 65% board keeps arrows but drops the function row, while a 60% board pushes arrows and navigation onto layers and asks the most from your habits.
How to decide in 30 seconds
Ask yourself how often you use the numpad, F-keys, and arrows. If any of those are daily tools, do not punish yourself for wanting dedicated keys.
If you are unsure, TKL or 75% is the safest first choice.
Minute 11–15: Switch feel (the part you can’t “spec sheet” your way out of)
Switches are usually grouped by feel:
Linear
Linear switches are smooth from top to bottom. They are popular for gaming and light typing, but they can feel too easy if you bottom out hard.
Tactile
Tactile switches have a bump partway through the press. Many people like them for writing and office work because the bump gives feedback before the key bottoms out.
Clicky
Clicky switches add sound to the tactile bump. They can be satisfying at home and irritating in shared rooms, so treat them as a social decision, not just a feel decision.
Two concepts that matter more than most people realize
Actuation vs bottom-out - a switch activates before the key hits the bottom. If you hit every key hard, you are bottoming out, which can be tiring and loud.
Stabilizers - large keys like space, enter, and shift use stabilizers. Good stabilizers make the board feel better. Rattly ones make even an expensive board feel cheap.
Minute 16–20: Buying strategy
Beginner-friendly spec list
If you want a first board that lets you learn what you like, prioritize hot-swap sockets, decent stabilizers, a sensible layout such as TKL or 75%, PBT keycaps if possible, and simple programmability through QMK, VIA, or a similarly usable tool. Those specs keep the board flexible without forcing you into a full custom build.
Hot-swap vs soldered (what it really means)
Hot-swap means the switches pop in and out without solder, which is friendly for beginners and easy repairs. Soldered boards are more permanent and need tools or skill when you want to change switches.
For a first board, hot-swap is the easy choice.
Prebuilt vs custom (a calmer framing)
Prebuilt is for people who want to type now. Custom is for people who want the build process.
A calm beginner path is to buy a hot-swap prebuilt, use it stock for a week, and change one thing at a time. That gives you a real baseline instead of turning the first purchase into a pile of guesses.
Minute 21–25: Sound and feel are a system
You don’t press “a switch.” You press a switch inside a keyboard.
Case material, mounting style, plate material, keycaps, desk surface, and room acoustics all change sound and feel. Metal cases often sound sharper, plastics can sound softer, gasket mounts can feel cushier, tray mounts can feel firmer, and thick PBT keycaps often sound deeper than thin ABS. Even the desk matters; a hollow desktop can amplify a board that sounded fine in a review.
This is why the same switch can sound different in two boards.
Ergonomics (the part that matters after the honeymoon)
If you type for hours, comfort is worth more than novelty.
Angle, height, and fatigue
Many mechanical keyboards are taller than membrane boards. If your wrists bend upward while typing, you may feel fatigue.
Two easy fixes are lowering the keyboard angle and adding a wrist rest if it keeps your wrists neutral.
Layout ergonomics
Smaller layouts can improve mouse ergonomics because your hands sit closer together. But if you constantly reach for missing keys on layers, the mental overhead can outweigh the ergonomic gain.
If you’re a heavy shortcut user, 75% is often the best “compact but practical” layout.
Programming and layers (why QMK/VIA is a superpower)
Programmable boards let you adapt the keyboard to your habits instead of adapting your habits to the keyboard.
Common quality-of-life mappings include easier arrows on small boards, media keys, brightness controls, and app-specific shortcuts.
This is also why a smaller board can be viable: good layers make missing keys painless.
The beginner mod path
You don’t need to lube switches on day one. The fastest improvements usually come from reducing rattle and stabilizing the sound.
If you want to experiment, start with stabilizers because spacebar rattle makes any board feel cheap. Then try keycaps, because they change both touch and sound. Swap switches only after you know what you dislike. Add case foam or other dampening last, mainly when the board sounds hollow.
Doing one change at a time teaches you what actually matters to your preferences.
One more practical note: if you’re unsure about switch weight, start lighter than you think. Many beginners assume heavier switches are “more premium,” but lighter switches often reduce fatigue for long typing sessions. You can always go heavier later once you know you want that resistance.
Minute 26–30: A practical action plan
Step 1: Decide what you’re optimizing for
If you share space, prioritize quieter switches and decent stabilizers. If you game, prioritize layout ergonomics and consistent feel. If you type all day, prioritize comfort: a tactile or lighter linear switch, a sensible keycap profile, and a board height that does not force your wrists upward.
Step 2: Touch real switches
A switch tester can help, but it’s not perfect. It teaches you “rough categories,” not the full experience. If you can, try a friend’s board or a local meetup.
Step 3: Buy a board you’ll actually use
Your first board is for learning. You can always swap switches later (if hot-swap) or upgrade keycaps. Don’t start with a $400 “endgame” board before you know what you like.
Common beginner questions
“Do I need RGB?”
No. It can be fun, but it doesn’t improve typing feel.
“Cherry vs clones?”
Modern alternatives (Gateron, Kailh, and many others) can be excellent. Focus on the switch feel you want, not just the logo.
“Linear or tactile for my first keyboard?”
If you’re unsure, tactile is a safe all-purpose start. If you game primarily and want smoothness, start linear.
“Is 60% too small?”
For many beginners, yes. It’s not impossible, but it adds a layer-learning project on top of your new keyboard. 75% and TKL are easier first steps.
“Do I need a wrist rest?”
Not required, but many people find it improves comfort, especially with taller keycap profiles.
Quick reference
Switches
- Linear: smooth and fast
- Tactile: feedback without a click
- Clicky: bump plus click
- Silent: quiet office use
Layouts
- Full size: numpad and all
- TKL: no numpad
- 75%: balanced and practical
- 65%: compact with arrows
- 60%: smallest common layout
Budget
- $50 to $100: basics
- $100 to $200: best value
- $200 to $400: premium feel
- $400 and up: hobby territory
Next steps
Try a hot-swap board if you want room to change things later. Read the switch, layout, and building guides if you want more detail.