
Complete Stabilizer Guide
Stabilizers matter more than most people think. Bad ones make the board feel cheap. Good ones keep large keys smooth.
What Are Stabilizers?
Purpose
Stabilizers keep large keys steady so they do not wobble.
The keys that need them are the big ones. Spacebar, both shifts, Enter, Backspace, and the larger numpad keys.
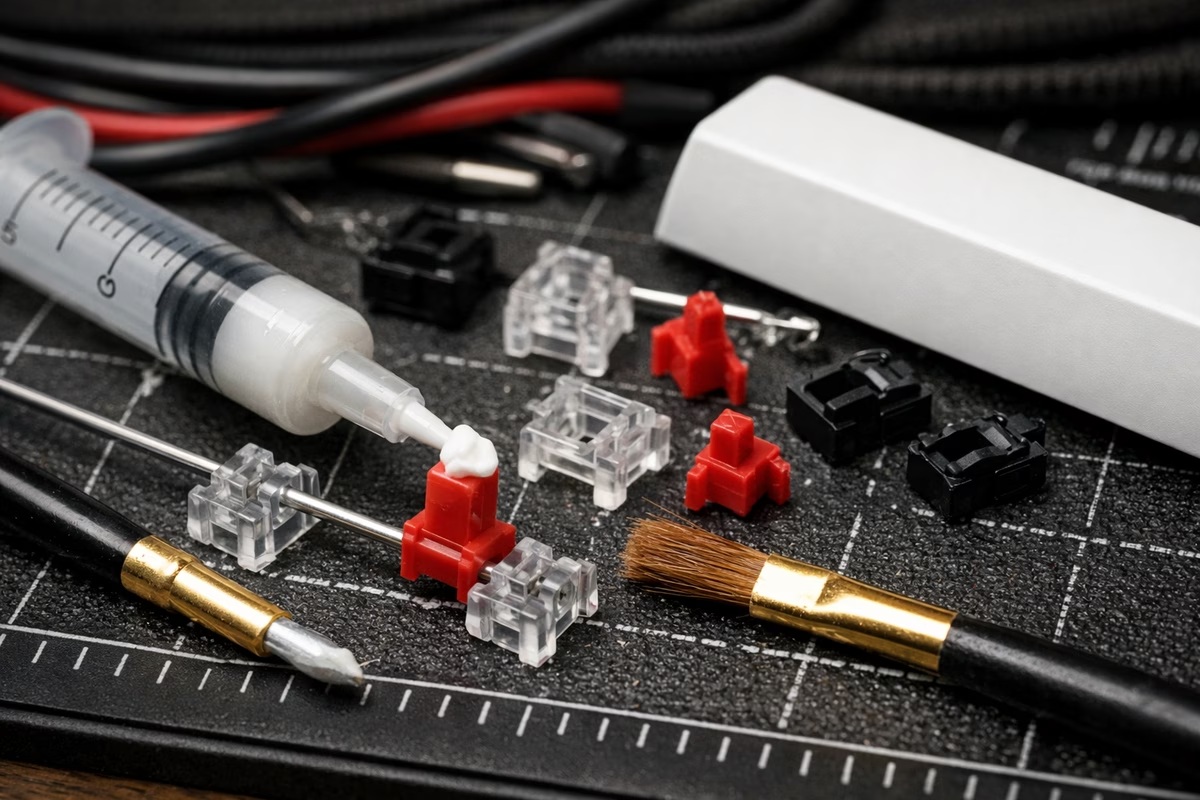
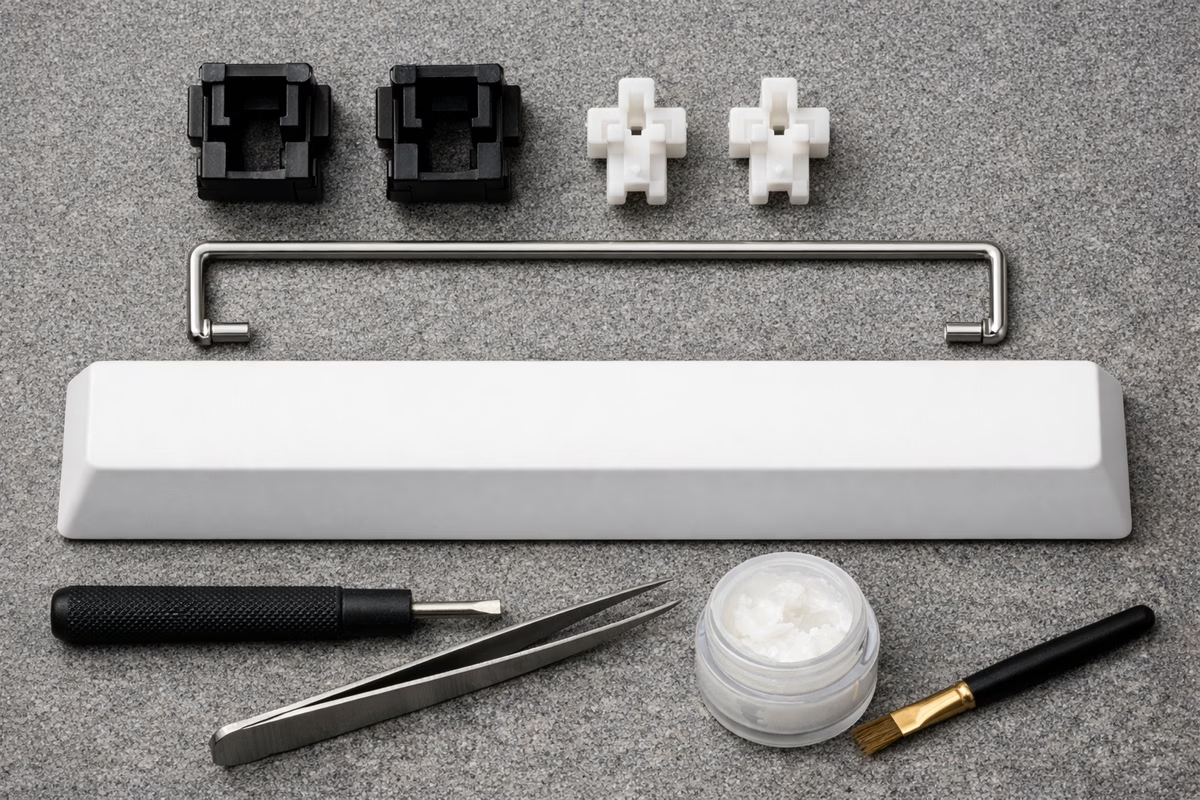
Mechanically, a stabilizer uses a metal wire under the keycap. The housings let both sides of a wide key move together. When the stabilizer is tuned well, the key feels controlled. When it is not, you get rattle, ticking, or a mushy spacebar.
Stabilizer Types
Plate-Mount Stabilizers
Plate-mount stabilizers clip into the plate, not the PCB.
They are easy to install, common in budget keyboards, and work with almost anything. The trade-off is stability. They can rattle more and can pop out more easily.
Use plate-mount when the board does not support PCB stabilizers or when you are working with an older prebuilt. You can still tune them, but the limit is lower.
PCB Screw-In Stabilizers
PCB screw-in stabilizers attach directly to the PCB, which is why they are the usual recommendation for custom boards.
Because screws hold the housings in place, they are more stable, easier to tune, and less likely to rattle.
The downside is compatibility. You need a PCB built for screw-ins, and installation takes a little more work. Durock V2, TX, Staebies, and C3 Equalz are common starting points.
PCB Snap-In Stabilizers
PCB snap-ins clip into the PCB without screws. They sit between plate-mount and screw-in in stability.
They are common in mid-range boards and some prebuilts. If your PCB supports screw-ins, that is usually the better long-term choice.
Stabilizer Sizes
Wire Sizes (By Key)
Most non-spacebar stabilizer wires are “2u,” but the spacebar is the one that trips people: it’s usually 6.25u or 7u, and the wire must match. Numpads also have a couple special cases (vertical 2u keys) depending on layout.
Important: Stabilizer wire size must match keycap size. A 6.25u wire won’t work with a 7u spacebar and vice versa.
How to Check Spacebar Size: On a standard layout, spacebars are commonly 6.25u. Some 60% boards and some ergo boards use 7u.
Stock Stabilizer Problems
Rattle
Cause: Wire hitting housing or loose tolerances.
Sound: Metallic rattle on keypresses and releases.
Fixes usually start with lubrication (wire contact points and housing), then optional mods like a small cushioning pad (“band-aid mod”) or a Holee-style wire wrap for stubborn ticking.
Ticking
Cause: Wire hitting housing on upstroke.
Sound: “Tick” sound when releasing key.
Fix:
- Lube wire contact points
- Dielectric grease on wire
- Balance wire properly
Mushy Feel
Cause: Over-lubed or poorly manufactured.
Feel: Spacebar feels slow, sluggish, sticky.
Fix:
- Wipe away excess lube
- Use thinner lube layer
- Upgrade stabilizers
Sticking
Cause: Over-lubed, debris, or bent wire.
Behavior: Key doesn’t return to top position quickly.
Fix:
- Remove excess lube
- Clean housing
- Check wire for bends
Tuning Stabilizers (Step-by-Step)
Tools Needed
- Krytox 205g0 lubricant ($15-20)
- Dielectric grease ($8) or Super Lube
- Small brush (size 00 or 000)
- Paper towels or cloth
- Isopropyl alcohol (optional, for cleaning)
- Band-aids (fabric, for band-aid mod)
- Scissors
Optional:
- Deskeys stabilizer films
- Stabilizer pads
Step 1: Remove Stabilizers
For Hot-Swap Boards:
- Remove keycaps from stabilized keys
- Remove switches around stabilizers (use switch puller)
- Unscrew stabilizers (screw-in) or unclip (snap-in/plate-mount)
For Soldered Boards:
- Desolder switches around stabilizers
- Remove stabilizers
Step 2: Disassemble Stabilizers
- Remove wire from housing (pull gently)
- Separate housing from PCB/plate
- Inspect for damage (bent wire, broken housing)
Step 3: Clean Stabilizers
- Wipe away factory lube (usually low-quality)
- Use isopropyl alcohol if stabilizers are greasy
- Dry completely before lubing
Step 4: Lube Stabilizer Housing
Apply Krytox 205g0 to:
- Inside walls where stem slides up/down
- Bottom of housing where stem bottoms out
- Around wire contact points
Technique:
- Thin, even layer
- Not too much! (less is more)
- Avoid over-lubing (causes mushiness)
Step 5: Lube Stabilizer Wire
Apply dielectric grease or 205g0 to:
- Both ends of wire (where wire contacts housing)
- Middle of wire (lightly)
Why Dielectric Grease? Dielectric grease is thicker and stickier, keeping wire from rattling. Some prefer 205g0 for consistency.
Technique:
- Focus on wire ends (critical for eliminating rattle)
- Moderate amount (not dripping, but visible)
Step 6: Band-Aid Mod (Optional but Recommended)
What It Does: Reduces impact noise when stabilizer bottoms out.
How to Do It:
- Cut small piece of fabric band-aid
- Place on PCB where stabilizer housing sits
- Apply thin layer of 205g0 on top of band-aid
- Proceed with stabilizer installation
Effect: Softer, quieter bottom-out sound.
Step 7: Holee Mod (Advanced, Optional)
What It Does: Eliminates wire rattle by preventing wire from moving in stem holes.
How to Do It:
- Cut small pieces of fabric band-aid (2mm x 3mm)
- Insert into stabilizer stem holes (where wire goes)
- Reinsert wire through band-aid material
Effect: Significantly reduces or eliminates wire rattle.
Warning: Can make stabilizer feel slightly mushier if too much material is used. Use thin band-aids only.
Step 8: Reassemble Stabilizers
- Insert wire into housing (ensure it’s seated properly)
- Check that wire is balanced (equal on both sides)
- Screw or clip stabilizers back onto PCB/plate
- Ensure stabilizers are secure
Step 9: Test Stabilizers
- Press stabilized key positions (without keycaps)
- Listen for rattle, ticking, or sticking
- Feel should be smooth, no binding
- If issues persist, disassemble and re-tune
Step 10: Install Switches and Keycaps
- Install switches back into board
- Install keycaps
- Test all stabilized keys
- Enjoy smooth, rattle-free stabilizers!
Premium Stabilizer Brands
Durock V2 Screw-In
Price: $15-20 per set Type: PCB screw-in
Pros:
- Excellent quality out of box
- Tight tolerances
- Less rattle than stock
- Good value
Cons:
- Still needs tuning for best results
Verdict: Best value stabilizers. Go-to choice for custom builds.
TX Stabilizers
Price: $20-25 per set Mounting: PCB screw-in
Pros:
- Tighter tolerances than Durock
- Premium materials
- Smoother wire
- Less tuning required
Cons:
- More expensive
- Harder to find in stock
Verdict: Premium option for those chasing perfection.
Staebies
Price: $25-30 per set Type: PCB screw-in
Pros:
- Best-in-class tolerances
- Unique stem design (reduces rattle)
- Less lube needed
- Top-tier sound and feel
Cons:
- Expensive
- Often out of stock
- Requires compatible PCB
Verdict: Endgame stabilizers for enthusiasts.
C3 Equalz Screw-In
Price: $18-22 per set Type: PCB screw-in
Pros:
- Good quality
- Multiple color options
- Decent tolerances
Cons:
- Not as refined as Durock or TX
- Can still be rattly
Verdict: Decent alternative if Durock unavailable.
Cherry Plate-Mount (OEM)
Price: $5-10 per set Type: Plate-mount
Pros:
- Cheap
- Widely available
- Compatible with most boards
Cons:
- Rattly
- Poor tolerances
- Difficult to tune
- Plate-mount (less stable)
Verdict: Avoid if possible. Upgrade to screw-in.
Troubleshooting Stabilizer Issues
Spacebar Sounds Different Left vs. Right
Cause: Unbalanced wire or uneven lubing.
Fix:
- Remove spacebar keycap
- Check wire balance (should be centered)
- Re-lube evenly on both sides
Spacebar Sticks or Feels Mushy
Cause: Over-lubed stabilizers.
Fix:
- Disassemble stabilizers
- Wipe away excess lube
- Apply thinner layer
Rattle Persists After Tuning
Cause: Wire not seated properly, or housing has too much play.
Fix:
- Holee mod (fill stem holes with band-aid)
- Upgrade to better stabilizers (Durock, TX)
- Use stabilizer films (Deskeys)
Stabilizer Wire Pops Out
Cause: Wire not fully inserted into housing, or housing damaged.
Fix:
- Ensure wire is fully seated in housing
- Check housing for cracks or damage
- Replace housing if damaged
Spacebar Feels Lopsided
Cause: Unbalanced wire or one side isn’t seated properly.
Fix:
- Remove spacebar keycap
- Check wire balance visually
- Ensure both housing ends are seated correctly
Stabilizer Mods (Advanced)
Deskeys Stabilizer Films
What They Do: Reduce housing wobble, tighten tolerances.
Installation: Place film between stabilizer housing and PCB.
Effect: Tighter feel, less rattle.
Stabilizer Pads
What They Do: Silicone pads placed under stabilizer housings to dampen sound.
Effect: Quieter bottom-out, softer sound.
Wire Swapping
What It Is: Replacing stock wires with gold-plated or higher-quality wires.
Benefit: Better tolerances, less rattle.
Sources: TX wires, Durock wires, C3 Equalz wires.
Stabilizer Installation Tips
Don’t Over-Tighten Screws
Problem: Over-tightening screw-in stabilizers can warp PCB or crack housing.
Solution: Tighten until snug, don’t overtighten. Stabilizer should be secure but not stressed.
Test Before Full Assembly
Why: Easier to fix stabilizer issues before all switches are installed.
How:
- Install stabilizers
- Install switches around stabilizers
- Test stabilized keys
- Tune further if needed
- Install remaining switches
Balance Wires Properly
Check: Wire should be centered and balanced (equal distance on both sides).
How:
- Hold stabilizer in front of you
- Wire should look symmetrical
- Adjust if one side is longer
Takeaway
Stabilizers matter: Bad stabilizers ruin typing experience. Well-tuned stabilizers are smooth and satisfying.
Best stabilizers:
- Durock V2 (best value)
- TX Stabilizers (premium)
- Staebies (endgame)
Essential mods:
- Lube housing and wire
- Balance wire properly
- Band-aid mod (optional but recommended)
Advanced mods:
- Holee mod (eliminates rattle)
- Stabilizer films (tightens tolerances)
Tuning takes time but is worth it. Spend 30 minutes tuning stabilizers for years of smooth typing.
Next Steps
- Modding Guide - Complete keyboard modification techniques
- Building Guide - Build a custom keyboard with proper stabilizers
- Sound Profiles - Understand how stabilizers affect sound
Make the keyboard serve the hands
Mechanical keyboard work can drift into parts collecting unless it returns to use. For Complete Stabilizer Guide: Types, Installation, and Tuning, the useful question is how sound, feel, layout, maintenance, desk space, firmware, and typing habits work together for the person at the desk.
Start with the problem you can feel. Is the board too loud, too tall, too stiff, too cramped, too unstable, or too distracting? A clear complaint makes the next change easier. Without it, every switch, foam, cap, and case sounds equally tempting.
Then change one variable. Swap keycaps before rebuilding the whole board. Test a switch sample before ordering a full set. Adjust layers before buying another compact layout. Clean and stabilize before assuming the design is wrong.
Good notes save money. Record switch, spring, keycap profile, plate, foam, desk mat, and what actually changed. The ear and fingers forget faster than expected.
Stabilizer work should make the board more personal and more usable, not merely more elaborate. The best keyboard disappears into the work when it needs to.
What to notice after you use this guide
After reading this guide, choose one next action that can be observed. A guide becomes more valuable when it changes a real choice, not only when it adds more facts.
Name the context. Where are you, what are you trying to improve, and what would count as a good result? The answer keeps the advice grounded in daily life.
Change one variable first. A small controlled change teaches more than a dramatic reset because you can tell what mattered.
Keep one note. Write the date, the choice, the outcome, and the thing you would repeat. The note can be plain and still useful.
Look for tradeoffs. Better mechanical keyboard decisions often involve cost, time, maintenance, comfort, fit, risk, or skill. Seeing the tradeoff makes the decision calmer.
If the result is unclear, wait before adding another fix. Some lessons need a second use, a different day, or a quieter comparison.
If the stakes are high, use qualified sources and professional guidance where appropriate. A guide can organize the question, but it should not pretend to replace expertise.
The goal is practical confidence. Complete Stabilizer Guide: Types, Installation, and Tuning should make the next step easier to choose and easier to repeat.